
Thriivan's walkthroughs
Shin Megami Tensei: Persona
◈◈◈
SEBEC
This is a personal Walkthrough for the 2009 re-release for PSP that was previously known as Revelations: Persona. SEBEC is what the main story is called, so if you are playing for the first time, you're in the right place.I also created a Contact Guide which you can use to help yourself with demon negotiations. It'll look confusing now, but will make sense when you play the game. I recommend keeping that off to the side for easy access.
Thriivan's walkthroughs
Contents

Thriivan's walkthroughs
Beginning the Game
Choose your difficulty. There is no shame in the difficulty setting you choose! I chose beginner mode because I simply wanted to experience the game, and the story. After you select a setting, you will witness some introductory cutscenes.The protagonist has 3 canonical names: Naoya Toudou with the nickname Naorin in the manga, Jihei Suzakuin with the nickname Jay in the novel, and Yuuya Narumi in the play. I recommend naming your character a Japanese name to keep the name from being out of place, but obviously pick whatever you like. For the sake of this walkthrough, I will be referring to him as MC, for main character.After the cutscenes, examine the chest on the right side of the room to receive Medicine. The pink tree toward the top of the room is called an Agastya Tree, where you can save your game. When you're ready, exit the Infirmary.
Thriivan's walkthroughs
St. Hermelin Part I
You will now shift into 1st person perspective. Use the mini-map in the bottom left of the screen to help keep track of where you are.In this game, you can have 5 party members total. In the SEBEC route, there are 4 set in stone: MC,
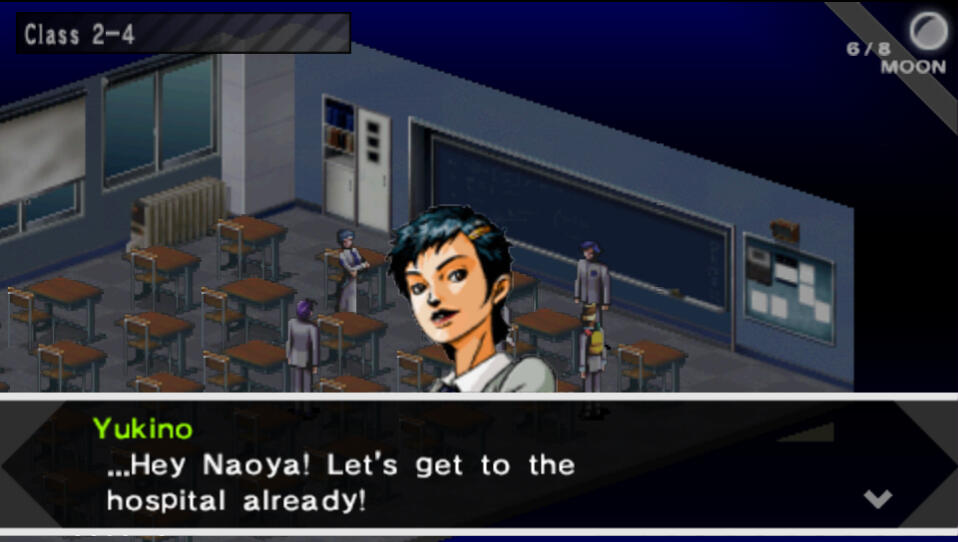
Enter the Teacher's Lounge immediately beside it on the left and talk to the male teacher in a brown suit. After this, talk to Mark. Exit the lounge and take a left (north) and take the stairs to 2F. Turn right (south) then continue walking along the hall until you reach the last door on the right, just before the next set of stairs. Enter to overhear a short conversation. Exit the room then go straight (east) and enter one of the last two doors on the right. You'll watch a short scene with Reiji. Exit the room, then backtrack to the stairs you used to come up to 2F and right across from them is Class 2-1. Talk to the generic NPC there and he'll talk about dismantling derelict buildings.Head to Class 2-4 and have a short conversation with Yuko. When she asks you to deliver a message to Maki, accept her request. At this point you can leave the school if you like, so explore 'til your heart's content, and then head down to the exit on 1F when you're ready. After a few scenes you'll find yourself on the City Map.

Thriivan's walkthroughs
Joy Street
For starters, I would like to immediately point out that if you hold down ▢ it will show you all locations you can interact with. This makes the map travel much easier.Reiji Recruitment: From St. Hermelin, head north one screen, and then east one screen. Enter Joy Street and once inside, enter Judgement 1999 which is the first door on your right. Speak to the blond man next to Mark for some more details about Reiji. When you leave the casino, the door directly across the hall leads to another Agastya Tree.Leave Joy Street. Head one screen south to find the Abandoned Factory. Enter it for another scene with Reiji. Now head back to Joy Street and find the Yin Yan shop, which is located on the western area of the map. Speak to the woman in yellow to find out more details about Reiji. You MUST answer Yeah and Sure for Reiji to join you later.You can go ahead and finally head to Mikage Hospital now.
Thriivan's walkthroughs
Mikage Hospital
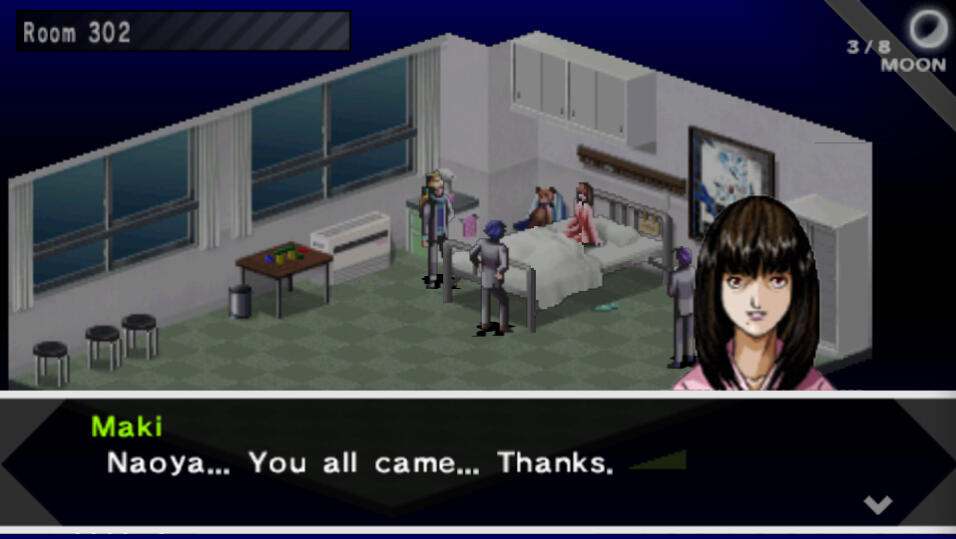
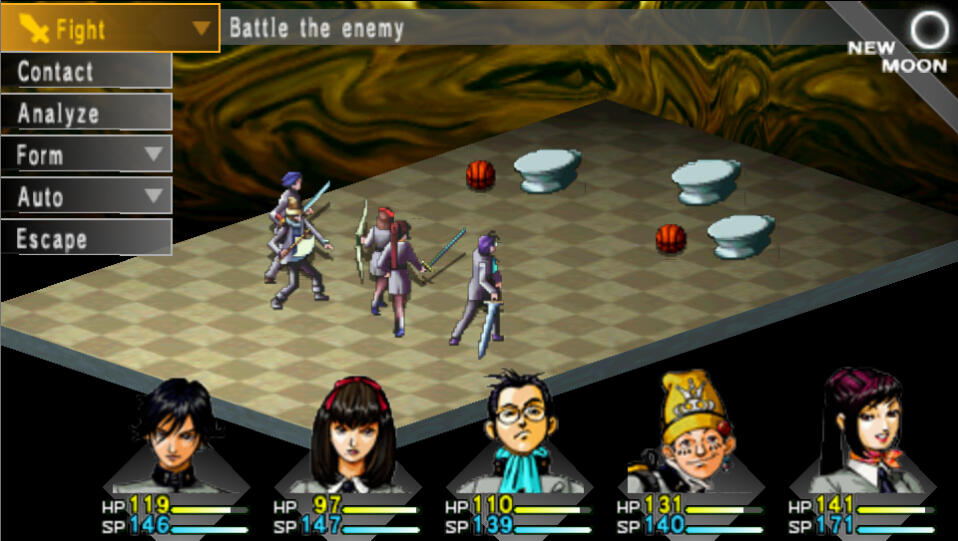
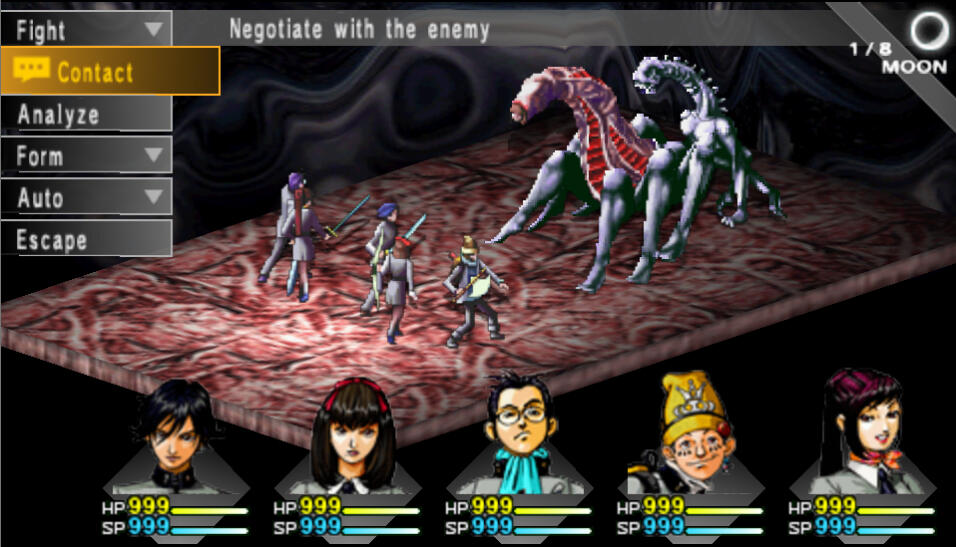
From the area of the map with Joy Street, just head north one screen to find Mikage Hospital. After entering, there is a short cutscene. Once it's over, go ahead and enter the door. Maki is in Room 302 so just head straight to 3F and enter the second door on the right.After some scenes, you will find yourself looking at the battle screen for the first time. This first battle happens automatically like a cutscene. After the battle you will all level up, go ahead and allocate your MC's points however you like. The other party members will auto-allocate their points. Once the scenes are all over and you're in control again, speak to everyone if you like, and then exit the room.There will now be random encounters. Please note that the Analyze feature does not take up a turn, and all you have to do to unlock the details for each creature is defeat them in battle once. From then on, you'll have all their weaknesses and info when you encounter them again. This is a crucial and very useful feature.The Contact feature allows you to enter a negotiation with the demons to gain various things such as items, or healing. But the most important thing here is Spell Cards. To get their Spell Cards, you must raise their eagerness (yellow) to max. This is honestly kind of hard to figure out on your own, so I have included a complete guide on what to say to each specific persona hereTurn south and enter the first room around the corner to find the 2F Nurse's Center. Open the chests to find Medicine x6 and QQ Helmet x2. Equip the helmets, exit the room, and head west. Enter the room around the corner to find an Agastya Tree. When finished, head up the stairs to 3F.Follow the path until you reach the second fork. Enter the Nurse's Station to the right and open the chests to find DisPoison and QQ Helmet x2. Equip the helmets on your other two team members, then exit the room. Head down the halls northwest until you find the stairs. Go downstairs to 2F.Follow the left hallway around to the first room you see to find another Agastya Tree. Then, head straight east to find another set of stairs. Go down the stairs to 1F.Hug the corner around to the right and follow the hallway until you reach a fork. Take a right at the fork and you'll find a room with a doctor in it. He will heal you, so this hallway is a great spot to grind a bit before moving on. I recommend doing so. Your personas will rank up faster if you use their skills in battle. Make sure to open the chest to find Medicine x2.Once you are ready to move on, take the other path from that fork until you reach a room straight ahead at another fork. Enter to find an Agastya Tree. Go around to the room behind this to find the Reception Desk.After the cutscene you'll have the option to save the nurse or not. If you decide to save the nurse,
Elly will arrive and you'll fight some zombies. Saving the nurse is one of the crucial “moral” choices that will affect the ending. This is also an automatic battle that gives a lot of exp, so I recommend trying to save the nurse. Elly will temporarily join the party afterward. If you're not planning to use her as your 5th member, then give her weapon to MC. Exit the hospital then head south to the next screen, keeping in mind that there are now random encounters on the City Map.
Thriivan's walkthroughs
Alaya Shrine Part I
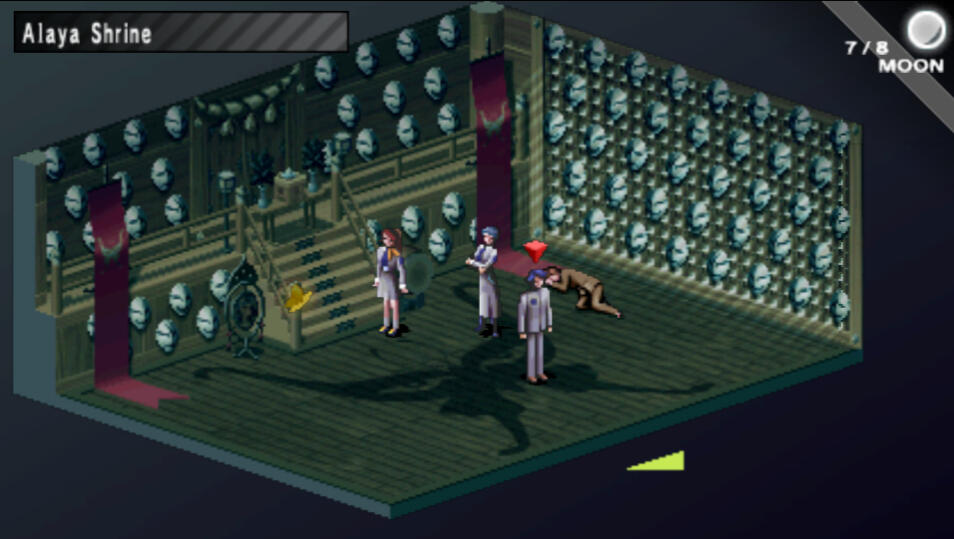
Reiji Recruitment: Head to one of the red markers by the SEBEC building to see another Reiji scene.Head south one screen, and west one screen to find Alaya Shrine, and enter. After some cutscenes, Mark and Kei will leave the party. You can use the butterfly to heal, so right outside the shrine is good grinding spot if you would like to do so. When you are ready, we are heading back to school.

Thriivan's walkthroughs
St. Hermelin Part II
After the cutscenes you will be in the Infirmary again. Save your game at the Agastya Tree in the corner. There are two different story routes in this game. The main SEBEC route, and another called Snow Queen. In this walkthrough we are taking the SEBEC route. If you plan on doing both, now would be the time to create a second save, so you can just come back here to begin the Snow Queen story. You can find the Snow Queen walkthrough hereFrom the Infirmary, head east down the hall until the end and turn right to find the exit. Do NOT talk to Ayase or Yuko yet. First, take the other door on the bottom of the screen to get to the gym. If you make your way around this hallway to the other end, you'll find a series of small rooms. They are as follows:
1. Drama Club: There are just students inside.
2. Boxing Club: Enter to find Boxing Glove and Headgear x3.
3. Archery Club: Enter to find Archery Set.
4. Fencing Club: Enter for a quick cutscene. Speak to Tamaki for a Rapier and a chest containing Arm Guard x3.
5. Ballet Club: Enter to find Toe Shoes x2. You can now backtrack to the passageway with the hole. Talk to Ayase and Yuko and then attempt to enter the hole. To keep on the main SEBEC storyline, say, "That's the plan."After the cutscene, open up your equipment menu and equip the optimal equipment to your whole party. Exit through the hole and watch a cutscene and enjoy some free exp.After the cutscene head north two screens to find the Mikage Police Station and enter.
Thriivan's walkthroughs
Mikage Police Station
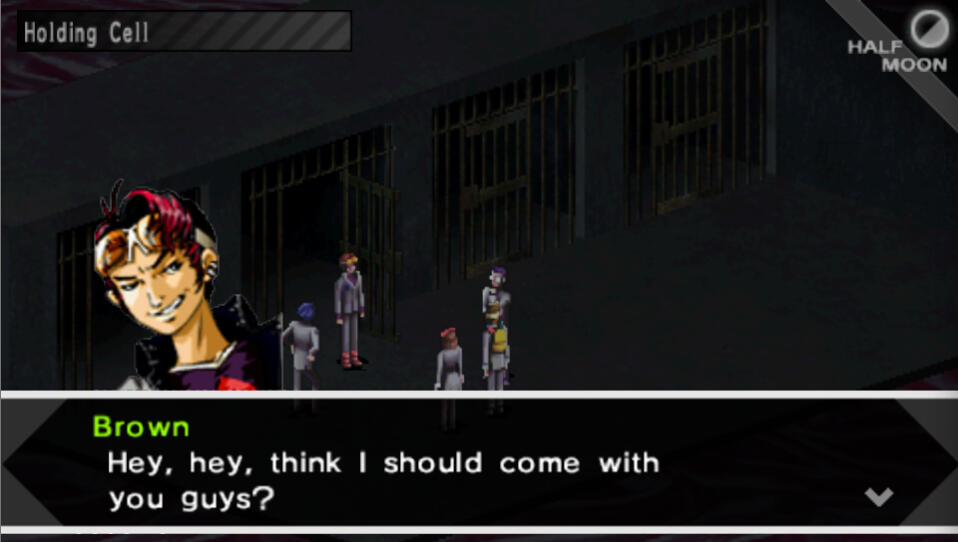
When you enter, there is a cutscene. Once in control, examine the key box in the upper corner to obtain Prison Key. Enter the door on the left. There is an Agastya Tree just across the hall if you would like to save your game. 1F is pretty simple so just follow the pathway until you reach the stairs, and head up to 2F. Follow the hall, taking a left at the first fork and a right at the second fork. There will be an Agastya Tree on your right if you'd like to stop and save, but otherwise, continue walking until you reach another set of stairs. head down the stairs to 1F and enter the room here around the corner. Watch a cutscene with Mark and Brown, and another automatic battle with some free exp.Brown/Hidehiko Recruitment: After the battle, Brown will ask to join you. Remember, if you allow him to join, you are locked in with him and cannot get any other party members after this. Make your choice, and continue.After the scene, make sure to select the optimal equipment for Mark, as well as Brown if you recruited him. Backtrack your way out of the Mikage Police Station and exit to the City Map.Next, we're heading to the Abandoned Factory.
Thriivan's walkthroughs
Abandoned Factory
The Abandoned Factory will be found 2 screens south and 1 screen east.Elly Recruitment: If you did not recruit Brown, then on your way to the Abandoned Factory, you will notice red markers at the subway entrances. Interact with one to read dialogue about a girl in the same uniform as you. Enter any of the subway entrances and go downstairs to trigger a scene with Elly.There is a Doctor's Office next to the factory, and an Agastya Tree one screen to the north if you need them. When ready, enter the Abandoned Factory.Ayase Recruitment: If you have not recruited Brown or Elly, you can recruit Ayase; however, if you have not completed the previous tasks for recruiting Reiji either, then Ayase will automatically join you as your 5th member at this point.After the cutscene, take the stairs on the bottom right and follow the platform all the way to the end. Interact with the little yellowish box on the wall. After the cutscene, enter one of the two doors (it does not matter which one) to enter a dungeon where you start at B1F.Take a left at the first fork to find an Agastya Tree, then keep heading that way around the corner to find a switch, indicated by a red symbol on the mini-map. Turn it on and then head north some more until you see another lever on the west end. Turn it on and then head back around the corner and up north. Continue to follow this top hallway east. until you reach a set of stairs. Take the stairs to 1F. Head west and enter the only room there. Open the chests to obtain Medicine and Rattle Drink x2. When ready, exit to the bottom right. This door takes you inside the SEBEC Building.
Thriivan's walkthroughs
SEBEC Building
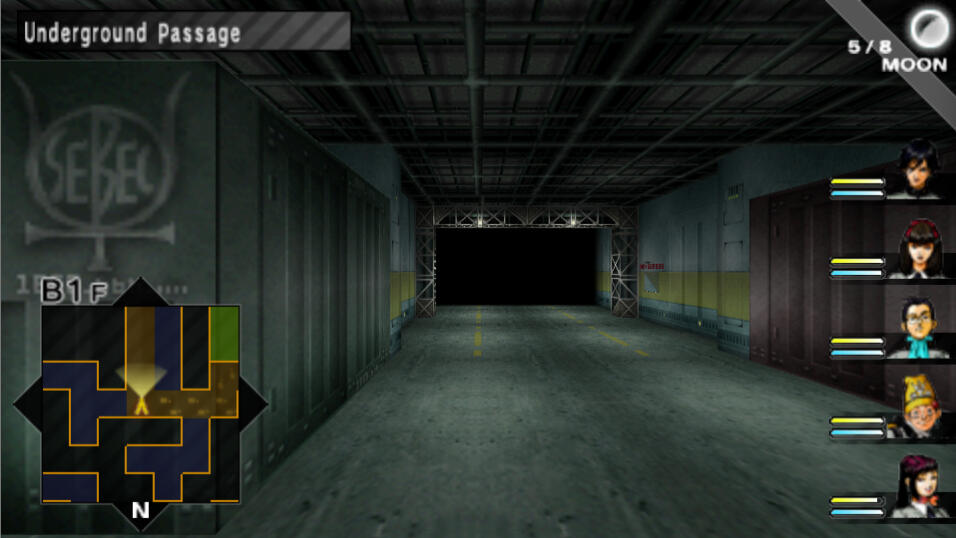
You now find yourself in the SEBEC Building on 1F. From here, head west and then north to the room on the right to find an Agastya Tree. In the room next to this, you will find a Fountain of Healing. Finally, the third room nearby is actually a General Store if you would like to browse or replenish any items. When you're ready, head south until you see an elevator, and take it to 2F.Head east until a room on your right, and enter. Open the lockers on the back room to find Spectra Vest x2, Glock 26, AK-47, and Shot Shells. Make sure to equip these items, then exit the room when you are ready.Continue east down the hallway to find another room, and enter. Open the lockers to obtain Rattle Drink x2, Flame Shawl, and Scorpion Whip. Leave the room and backtrack to the elevator. Take it to 3F.Make your way to the northeast corner of the map to find a room, and enter it. Here, you can find some interesting dialogue and 2 chests. The chest on the left will damage you a little when opened, but it's not bad. Open the chests to find Titanium Guard x2 and Spectra Vest. Equip your party and leave through the bottom right of the room. Make your way back to the elevator and head up to 4F.From the elevator, head left/west and around the corner to find an office room. Search the first three lockers to find Ingram, Delta Storm, and Shot Shells. The fourth locker on the right will just poison you. Head back to the elevator and take the other direction this time until you find a room in the northwest of the map, and enter. Search the lockers to find Rattle Drink, Black Shoes x2, Raven Feather, and Dis-Sick. Optimize your party's equipment and leave the room. Backtrack to the elevator and take it up to 5F.Head straight till you his a 3-way fork and take a right. Follow this hall to the room in the southeast corner. Search the lockers to find Mossberg M500, Spectra Vest x2, Shot Shells, and Titanium Guard. Optimize your party's equipment and leave the room. Head back to the 3-way fork and take the west path until you reach a set of stairs. Take them down to 4F.The first room to the north is a Velvet Room, where will meet Igor, a recurring character in the Persona franchise. You can fuse personas if you have at least two Spell Cards. The room next to this one is an Agastya Tree. Nearby the Velvet Room, there is a second staircase aside from the one that you arrived from. Take this new staircase down twice to reach 3F. Then, take a left from the stairs and down the hall to find another staircase. Go down to reach 2F. Follow this twisted hallway, keeping to the north when you can, to eventually find another set of stairs leading down. Use them to finally reach 1F.From here, take the south hallway to find an Agastya Tree, a Healing Pool, and a General Store. Prepare yourself while you can, because we are about to fight a boss.Backtrack toward the stairs and take the other hallway this time to find yet another new staircase. Take these all the way up to 5F. Enter the room for your first boss fight.Boss: Takeda, and 4 Agents: You start this battle a bit damaged, but go ahead and start by focusing on the Agents one at a time, and just keep healing with Dia and items when necessary. Use any attacks that damage all or multiple enemies at once when you can. once it's down to just Takeda, he will cast Delyte on the party, which mutes all of you. Don't even worry about unmuting yourself, because he is weak against physical attacks, so just finish him off as quick as you can, keeping an eye on your health.After the boss fight, examine the safe on the upper corner of the room to obtain Backsword. Equip the sword, then examine the phone on Takeda's desk to find a switch that opens up a secret door. Enter the door, and use the elevator within to ride down to B1F.The first room you see straight ahead contains an Agastya Tree, so I would recommend saving your progress since you just fought a boss. The room next to this contains some chests. The chests on the left damage you a bit, but they contain Titanium Guard x2 and Medicine. The third chest to the right contains Athame Knife. Optimize your party's equipment and head through the top left door when you're ready.You can ignore the rooms here if you like because they only contain NPCs to talk to and no items. Keep walking until you hit a large black room.Follow these instructions exactly: enter the room with 1 step east, then 1 south, 1 east, 1 south, 2 east, 3 north, 2 east, 1 south and 2 east. You should be in a lit corridor again. use the yellow markings you left on the mini map for reference to traverse through the black room if you need to. I've included the proper pathway below for your reference.

Now that you are in the lit hallways again, just follow the path south and enter the second room. You will not see another cutscene involving Kandori. During the scene, you must choose which button to press. Hit the RED Button. This is for the good ending and some of the best personas in the game. Keep watching the following scenes. Once you're in control, you'll be at St. Hermelin once again.
Thriivan's walkthroughs
St. Hermelin Part III
Once you're in control, speak to the girl here and then exit left after Maki. You'll notice that the hole in the wall is mysteriously gone. Enter the door to the school and head west to find the infirmary straight ahead at the end of the hall. After a quick scene, heal up and save your game.Next, head to 2F and find Class 2-5 right at the top of the stairs, and enter. The cutscene will explain a lot more of what's happening. Once you're in control, leave the classroom to see that the school map has now rearranged itself again. Head down the hall to the first room you see, it's a Velvet Room, and next to this room is the Infirmary. Two rooms north of the Infirmary is a General Store. This is a great place to grind and try to get spell cards if you like, but the Lilim enemies here cast Charm on your party and Mudo which makes you die in 2 turns, and it can get really frustrating.In this dungeon, there are doors that will teleport you to other places. You need to enter the correct doors in the right order to find the boss. If you turn to the right along the hallway next to the General Store, you'll find two of those doors. Enter either one.Now head north, and you'll pass Class 2-1, and the hall turns east. Head east to those two doors on your left(east). Enter either one.Now, just northeast is a fork. Take the south path to find an Agastya Tree with a locked room beside it. Save your game, and head to the nearby hall that heads east right to a staircase, and take the stairs up to 2F.Now just head south west until you hit the big fork and take the west path, and follow it around north, west, and south again to reach a classroom and enter. Do NOT pass the first classroom door, or you will fall down to the next floor through a hole.Reiji Recruitment: If you did all the previous Reiji steps and you also did not invite any other members as your 5th person, Reiji will automatically join you after this cutscene.After the cutscene, you can open the left and right chest for a Metal Card and Turquoise. Do not open the middle chest, all it does is poison you. Exit the classroom through the top door to to go around the pitfall in the hallway. Head around the corner and enter one of the two doors to teleport to the next area.Now head west, and then as far south as the map will let you, then turn east until you hit a corner, head north and you should see stairs around the corner from the middle path. Head down to 1F.Right around the corner to the west is an Agastya Tree and a Velvet Room. When you are read, head into the big room to the south for a boss fight.Boss: Tesso: This is just an endurance battle. Tesso has a gatling gun attack that deals high damage to a single target,
a bite that deals damage and paralyzes you and much less often it also uses Megido
which deals high nuclear damage to everybody. Just try to keep removing paralysis and heal, and do whatever high damage attacks and skills you have.After you are finished with the fight and the following cutscene, head back out the door to find the school has returned to it's normal layout. Head to the Library which can be found on 3F in the northwest corner next to the stairwell.Once you go through this cutscene, it's time to head to Alaya Shrine.
Thriivan's walkthroughs
Alaya Shrine Part II
Before you head to Alaya Shrine, head to Yin and Yan, on the same screen as the school and the shrine. to grab yourself some new gear. Also check out Rosa Candida at the Mikage Sun Mall which is located one screen north.Go ahead and head to Alaya Shrine when you're ready. It's on the same screen as the school, so if you went to the mall, just head back down a screen.After the cutscenes, it's time to make your way to the Historical Society. It's just one screen north. After you enter, just to the next room to retrieve the Expel Mirror. Leave the building. Next, just head to the east side of the same screen and enter the Mikage Subway.
Thriivan's walkthroughs
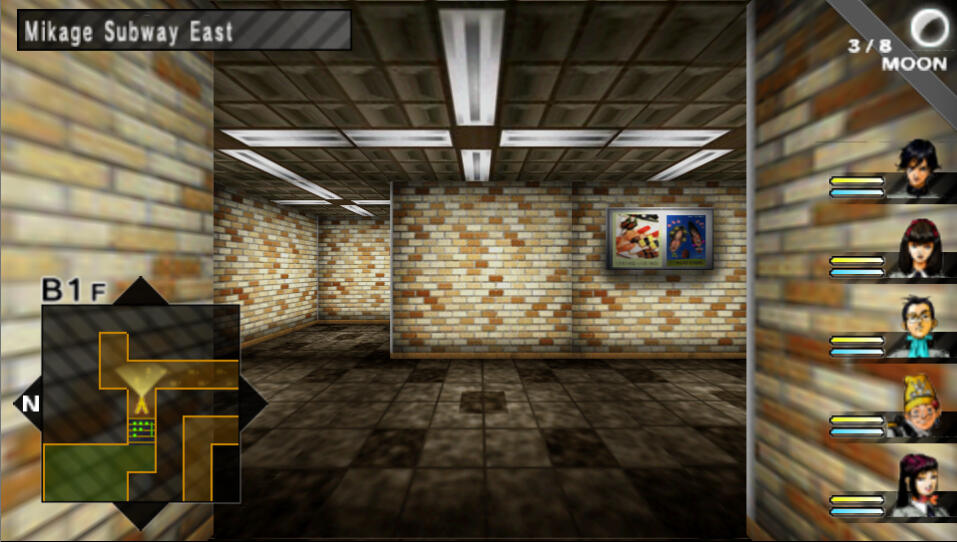
Mikage Subway
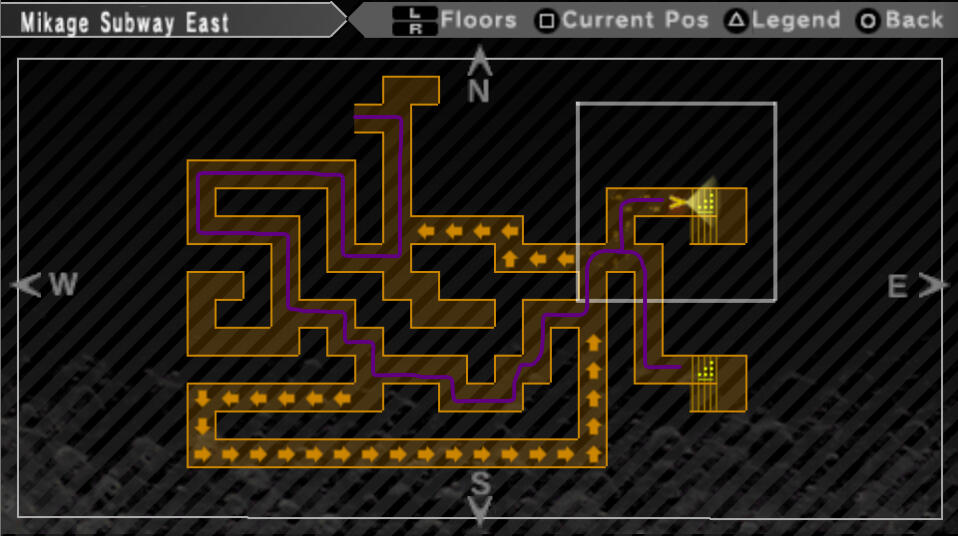
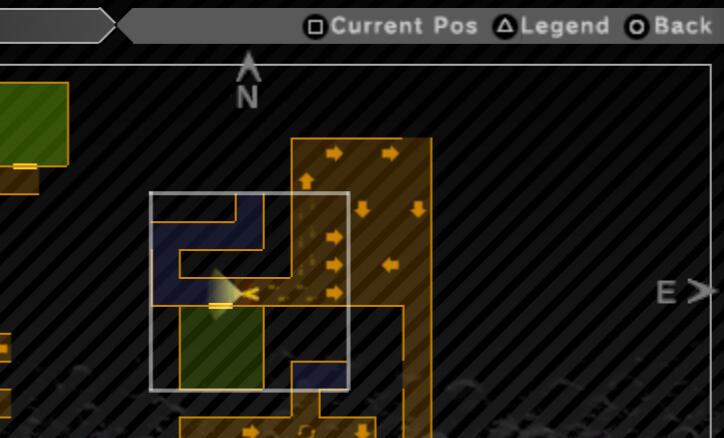
Mikage Subway is pretty big, and there are traps on the ground that force you to move, which can be annoying. After you walk into these traps, they appear on the map with arrows showing what direction they go. There is only one correct path through here. I went ahead and included an image below because it's a bit hard to explain with words.
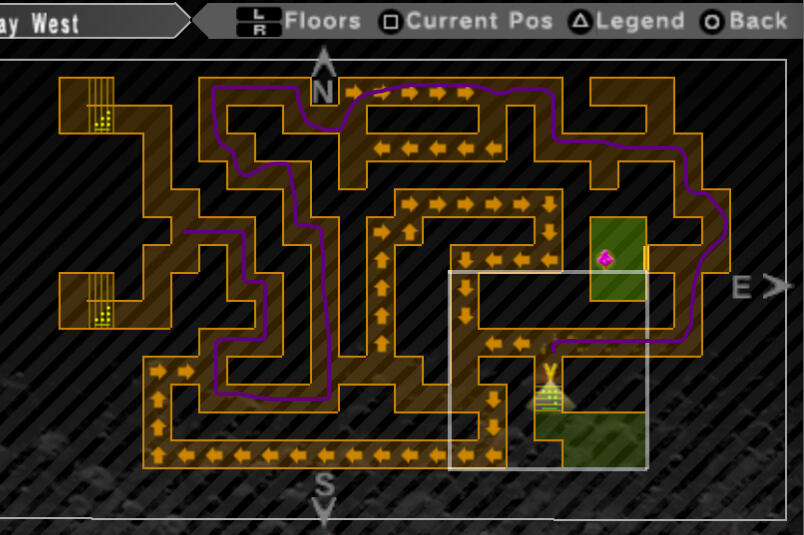
After you follow this path and head down the stairs, a cutscene will begin, and you'll fight a boss.Boss: Yog-Sothoth Jr.: He's not too difficult, he can resist electricity though, so avoid that. He is weak against Nuclear and 1-handed swords, so just use those when you can and keep yourself healed until he's dead.After you defeat the boss, you'll see a brief cutscene. When it's over, continue traveling through the subway by exiting on the right side of the room. Below is the path for the next floor.
After you find your way to the stairs you'll be outside again. You cannot leave this area of the map so just head straight to the Black Market.
Thriivan's walkthroughs
Black Market
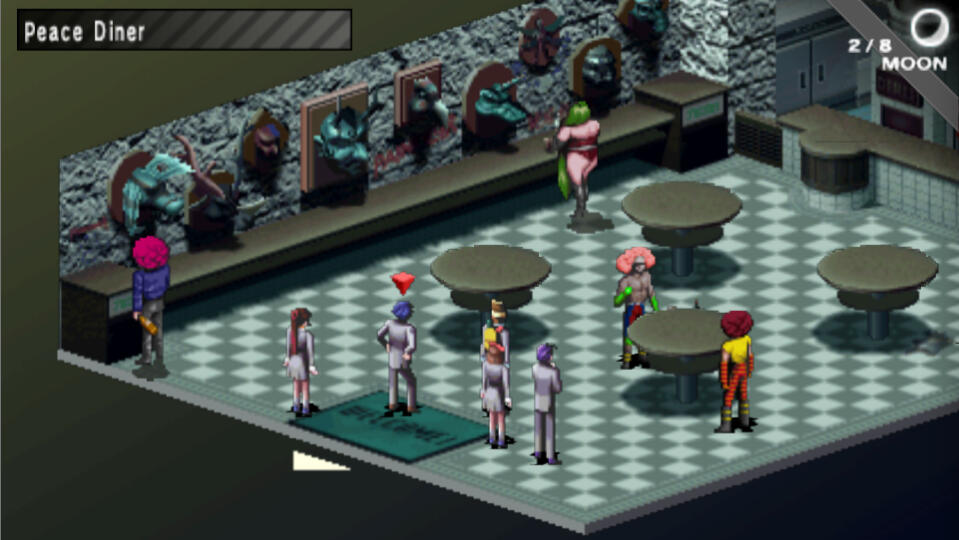
Entering from the south, there is an Agastya Tree in the first room on the left, so you can save your game. Feel free to upgrade your gear at the various shops here, and when you are ready, head to Peace Diner on the western section of the mall. Talk to everyone to get a better understanding of what's going on here.When ready, save your game and head into the door next to the casino, Judgement 1999, for a dungeon, Kama Palace.

Thriivan's walkthroughs
Kama Palace
Before you explore, make sure you have an Emergency Exit on hand, or a Persona with Traesto. First we are item collecting.You start on B1F. Obviously, take the stairs right in front of you down to B2F. This place is riddled with holes and dead ends, so follow these directions carefully to avoid confusion and frustration.Once on B2F, head west until you reach a fork. Take a right, and another right back east and take the elevator to B7F. Right in front of you are two rooms, an Agastya Tree on the right, and a Fairy Spring on the left for healing. Use these as you need to, and grind if you need to while you have the chance. Take the stairs by the Fairy Spring down. Do NOT go down the hallway to the other staircase when you are on B8F, just keep going down the same stairwell to reach B9F.On B9F, go east until you reach a room that contains three chests. You'll find Life Stone, Chewing Soul x2, and a Revival Bead.Make your way back up to B7F and ride the elevator up to B2F. From the elevator, head west and then south to the little dead end past the gate. This will make you fall down to B3F.Now, follow the path until you reach the second fork. You have a gate on both sides of you. Take the east one to drop down to B4F.On B4F, just go through the gate right there to the north to drop down to B5F.On B5F, just head south, east, and north through the gate to fall down to B6F.Now, just head down the hall until you reach the only room, which contains 2 chests. You will obtain Balm of Life x2, Bead x2, and Dx Incense.Exit back to the hallway, then go ahead and use that Emergency Exit or Traesto to head back to the Black Market to save, visit the Velvet Room, shop, etc. If you have no Emergency Exit or Traesto, make your way to the northwest corner of the floor, go through the gate and fall down to B7F and ride the elevator back up. Whenever you are ready, re-enter the Kama Palace.Head down to B2F of course, and work your way to the elevator again. This time, ride it to B4F.From here, head north at that first fork, then immediately west again at the fork right after it. Follow that path to reach a gate that drops you to B5F.On B5F, the gate to B6F is right next to you, so go ahead and drop down right away.On B6F, head east until you hit the tiny little fork, and then north, and west to go through the gate to B7F.On B7F, there is only one path with no forks, so just follow it to the gate to B8F.On B8F, head into the room directly to the south. After a cutscene, you can open the three chests within. Just beware that they are rigged. You will obtain Metal Card, Malachite, and Ag Incense. When you are ready, exit the room through the other door (the top one).Now, just follow the path until you reach a fork, and take the east path to fall down to B9F.On B9F, head into the room straight ahead, but DO NOT open any of the chests. None of them contain anything, and they all do damage to you. Just exit the room through the other door to the side.Head north until you see a fork with a gate on both sides. Take the right one to B10F.On B10F, the room right next to you is an Agastya Tree. Now, follow the path to a big room for 3 more chests, and DO NOT open the one next to the painting. It will give you nothing and reduce your whole party to 1HP. Open the other two chests for Onyx and Lu Incense. Leave the room through the bottom door to move onward. Follow the path and when you reach the fork, just go east to reach the Queen's Chamber.After the cutscene, you will be back in the Black Market. You need to head all the way back down to her chamber again, so you need to follow the same directions once again. If you didn't stray from the path at all, it should be easy enough to just follow the yellow you left behind on the map. Just remember, you are taking the elevator from B2F to B4F and then following those paths, and dropping down those holes. I recommend saving at the Agastya Tree in the mall first though.Before you enter the Queen's Chambers, please note that you will be given a very important decision that will change the game. Choose Maki's is better. for an easier battle, and the good ending of the game.Boss: Harem Queen: If you sided with Maki like suggested, you will be in battle with only MC and Maki. Just watch out for her Infinite Spiral attack, but aside from that she's not too dangerous, just keep healed, and attack as much as you can.After the battle, and the cutscenes, leave back out to the Black Market. Resupply, and exit through the north entrance when you are ready. We have a few small stops before the Lost Forest.
Thriivan's walkthroughs
Lost Forest Part I
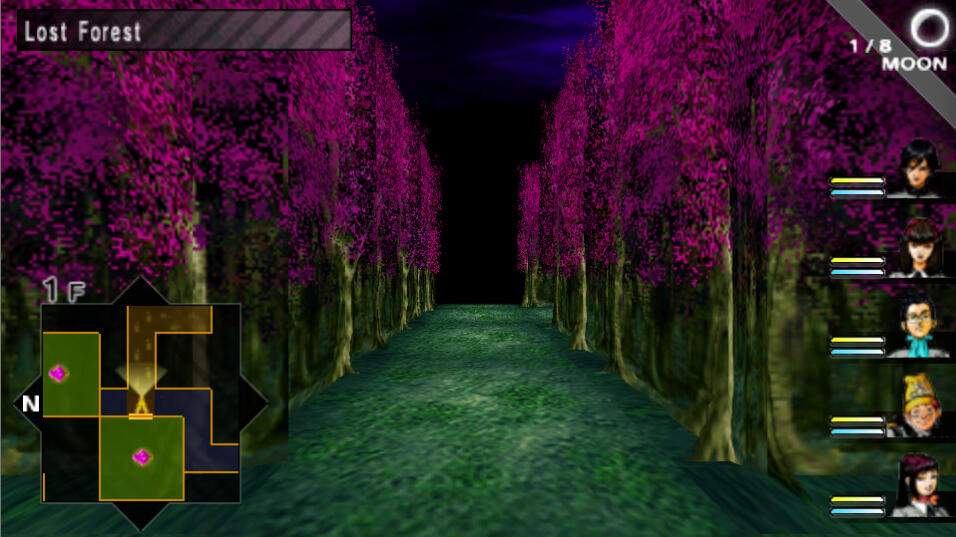
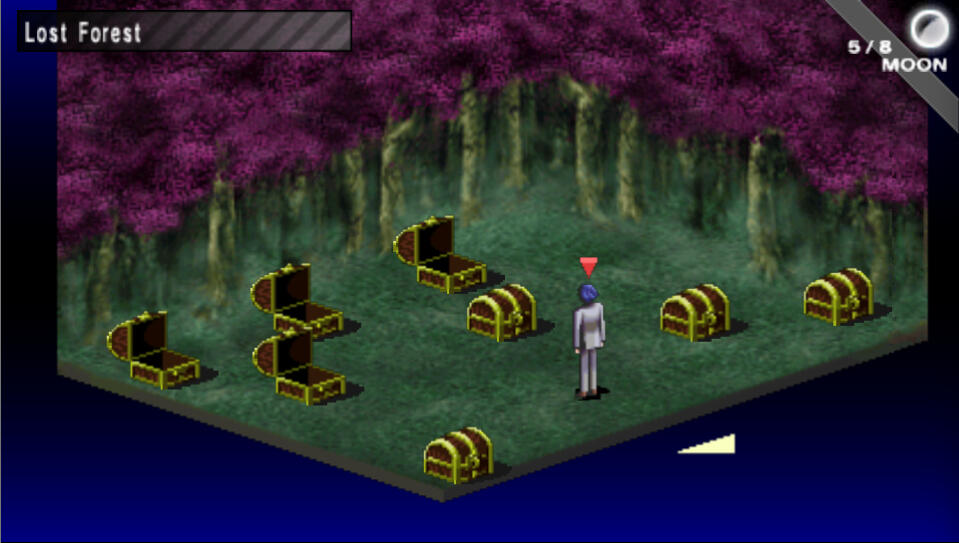
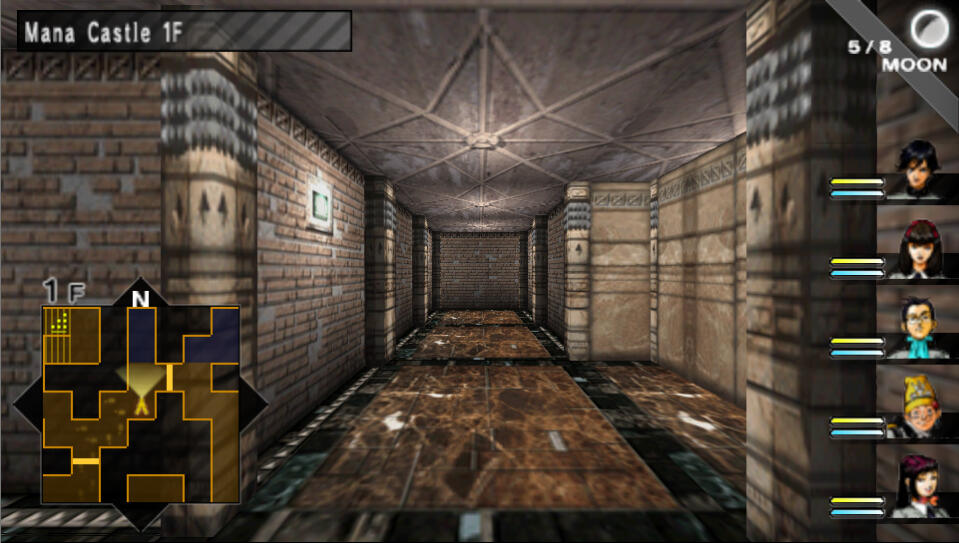
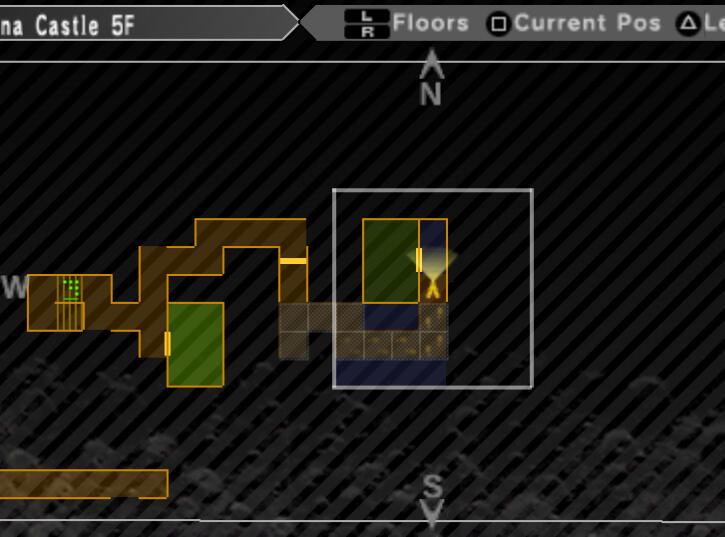
The first stop is one screen north, at Mana Castle. After the cutscene, head back to the Mikage Subway. You're making your way back through to that boss room, through to the other side, and back to the other entrance to make your way to the 1st Ward again.When you emerge, just head north one screen to find the Lost Forest. There is an Agastya Tree next to it, so you can save before entering. Enter the forest when you are ready.From the entrance, west is an Agastya Tree, south is a Fairy Spring, and east is where you need to go. So use those if you need to, but keep note that there are spinning tiles in this map that rotate you. As you head east from the entrance, take the second path that goes south. Follow this path up to the northeast corner, then keep following it south from that corner. Keep heading south past the square hallways until you see a long hallway going east and west. follow it west and then south and enter the room to find 8 chests. Only open the 4 chests in the image below to obtain Gottabe Shoes, Fomor Lineage, Metal Card, and Moonstone.
Now continue south, and east around the corner. and south again to a little intersection with one of those rotating tiles. Just keep stepping backwards onto it until you are facing west, and head west. Continue making your way west until you hit another rotating tile, and do the same thing to keep heading west. Take an immediate left and follow that path around west and north until you reach a fork. DO NOT turn east or you will be forced to go all the way around to get back. Turn west to find another Agastya Tree. Save your game so you don't have to do that shit again.Another critical choice coming up. Head south to the Gingerbread House (there is another rotating tile in front of it) and enter to see some cutscenes. To get the game's True ending, you must answer the following: "Stop hiding.", "For everyone's sake.", and "To find my reason."After the cutscene you must leave and head back to the other side of town through the subway again. Make your way back up to Mana Castle. Remember, you must go through the black market and exit from the north or east exits and then head one screen north to reach Mana Castle.
Thriivan's walkthroughs
Mana Castle
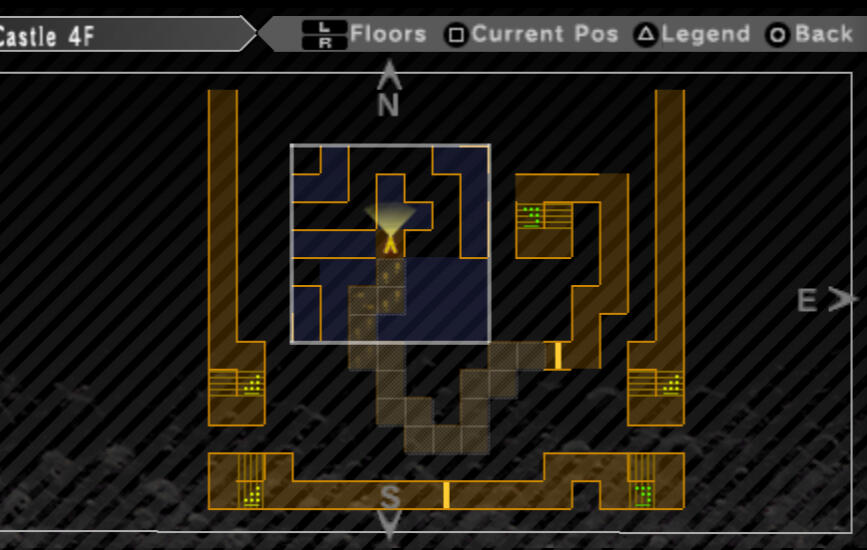
Upon entering, you will see another cutscene. Afterward, place the Compact Half on the pedestal and enter the dungeon.Head straight north to the fork. Take the west path and take it northeast to reach the staircase. Take them up to 2F.From here, head southeast, and then north to reach two rooms. This is a treasure room, and an Agastya Tree. Open the chests to obtain Revival Bead, Chewing Soul x2, Repulse Bell x2, Amethyst, and Life Stone. Make your way back to the staircase and head back down to 1F.From here, work your way south through 2 gates until you find another set of stairs. Take these up to 2F.Now make your way west, north a little, then east to the center of the room to find another staircase. Take these up to 3F.Just east is an Agastya Tree room. Save your game. From there, go south, west, south, and east to reach another staircase. Take these up to 4F.4F is just a straight shot to another set of stairs, so go ahead and head up to 5F.follow the path on 5F to reach a second set of stairs that goes back down to 4F.Follow the long hallways on 4F to reach yet another staircase going back up to 5F again.Finally, follow 5F until you find a room with 8 chests in it. Only open the one on the left corner, and the bottom corner to find Aquamarine, and White Tablet. These will both damage you upon opening. Leave the other chests be, they all reduce your HP to 1 with no reward.At This point I would recommend using an Emergency Exit or Traesto to get back up to 1F, then work your way back to 3F with the same route you took earlier.Save at the Agastya Tree again, and from the point you entered 3F, head west this time and follow some winding halls to reach a staircase going up to 4F.On 4F, head east and south until you reach a dark room just like the one at SEBEC. This time your path, from the gate, is going to be: 2W, 1S, 1W, 2S, 2W, 1N, 1W, 2N, 1W, 2N, 1E, 2N. The screenshot below shows it for you.
From here, follow the hall west, and then north to find a staircase leading up. Take the stairs to 5F.When you reach 5F, there is a room straight ahead. Enter to find 5 chests. Only open the 3 left-most chests to find Topaz, Present, and Dx Incense.From this room, head north, east at the fork, and south to find another one of those dark rooms. From the tile just outside, your path is as follows: 1S, 2E, 1S, 3E, 2N. Screenshot below.
Once to the other side, you'll be right next to an Agastya Tree. Save your game and head back into the dark room. You are about to fight a boss, that's why I had you save your game first.
From just outside the room, your directions are: 6S, 2W, 2N, 2W, 2S, 1W, 1S, 2W. Screenshot below.

Once to the other side, follow the paths until you reach a room. Make sure you're all healed up before you enter. After a cutscenes, you will enter a boss fight.Boss: Saurva: You begin the fight with half your members critcally injured, so do your best to heal them quickly. He is weak against Fire, Ice, and Wind. He is resistant to physical. He has a lot of HP so be patient.After the battle, leave the castle. Make a quick visit to the Black Market to heal up, restock,
upgrade your party's equipment and fuse some new personas, then just head south east from there to reach the Haunted Mansion.
Thriivan's walkthroughs
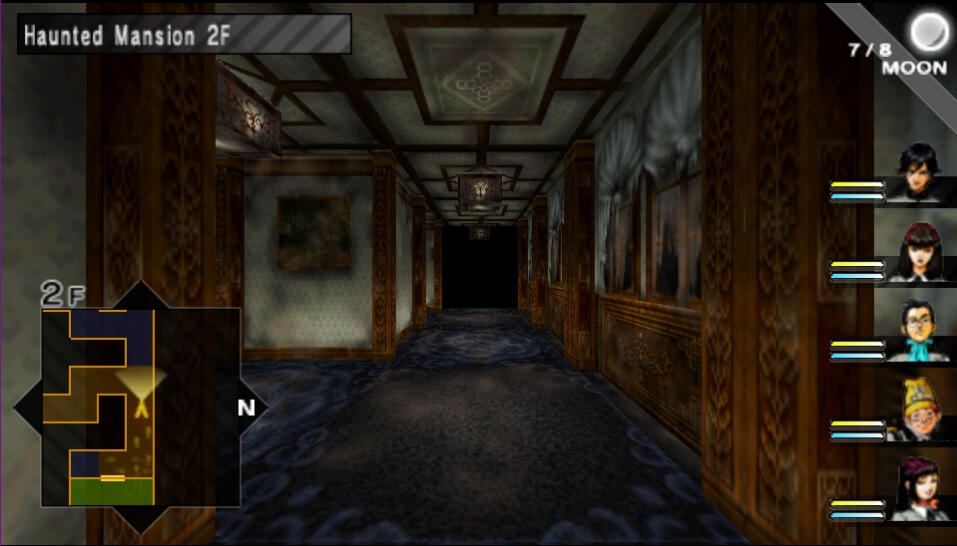
Haunted Mansion
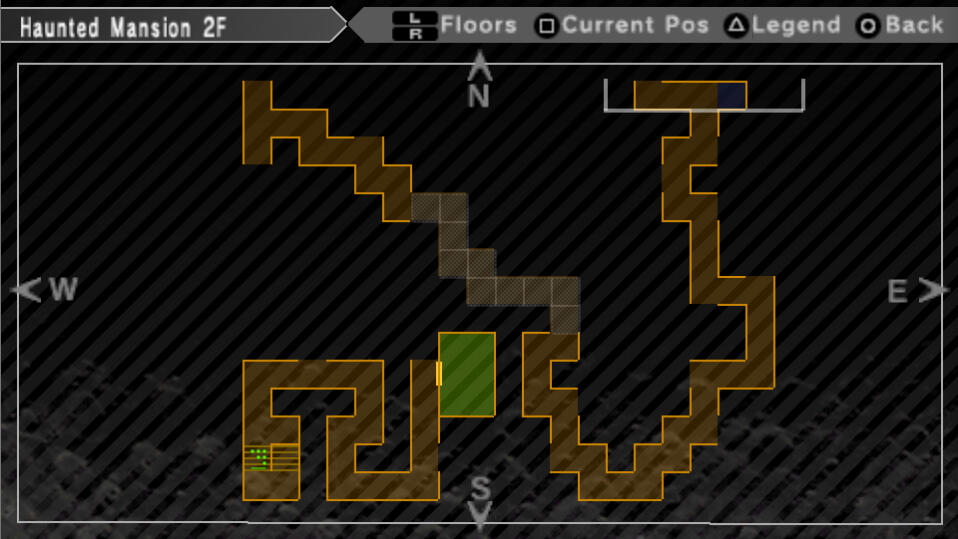
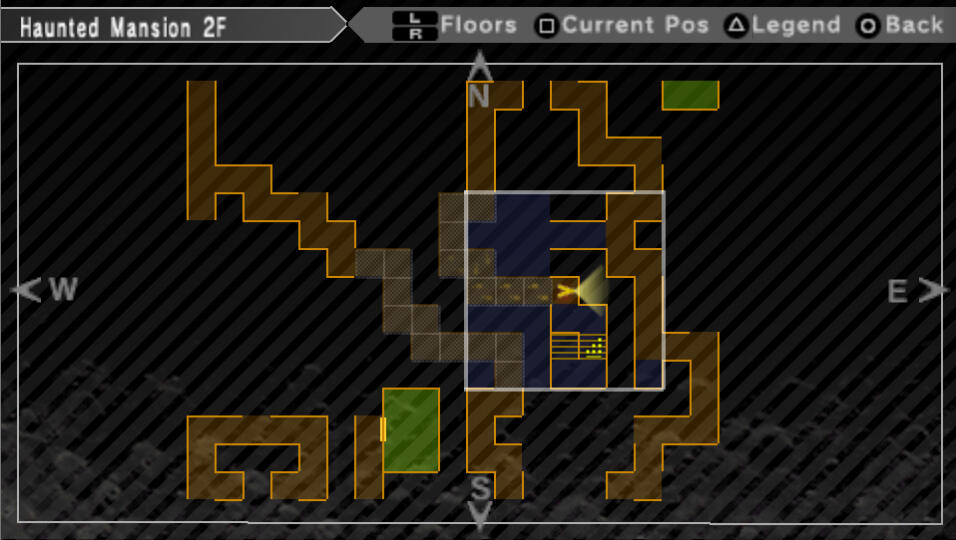
You are at a fork directly when you enter. Head west and zig zag north and south through the hall until you eventually reach the staircase. Take the stairs up to 2F.On 2F, take the east path at the fork to find a room. You can talk to the scientists for some details about the situation here. There are two chests in here, open the one by the painting to obtain Vi Incense. The other chest is empty, so go ahead back to the hallway.From here, back track back down the stairs all the way to the entrance of the mansion. Take the east path of the fork this time. make your way northeast and north and you'll find a room with an Agastya Tree. Save your gamex of course. From here, continue north, then west, then south to the big dark room. Another on of those. Your directions from the tile directly outside are: 4S, 2W, 1N, 2W. Pretty simple. Screenshot below.
Once outside the dark room head west, passing the fork, and enter the room just to the north. Speak to the scientists if you wish, and open the chests in the corner for Metal Card and Garnet. Exit the room and keep head north and east to find a staircase leading to 2F.On 2F, head west, then south, then southeast to reach another dark room. From the tile directly outside, your directions are: 2E, 2S, 1E, 1S, 3E, 2S. Screenshot below.
Once to the other side, you can also use the screenshot above to follow the path up to the northeast corner where you will find an Agastya Tree room. Go in and save again. From here, head west pass the hall you just came from, and south to the dark room once again. Your path from the tile directly outside is: 1S, 1W, 2S, 1E, 1S, 3E.
Once outside the dark room again, there is a staircase just to the south. Take them up to 3F.On 3F there is yet another dark room just ahead. Your directions from the tile just outside are: 2W, 2S, 4W, 4N, 1E, 2N. Screenshot below.
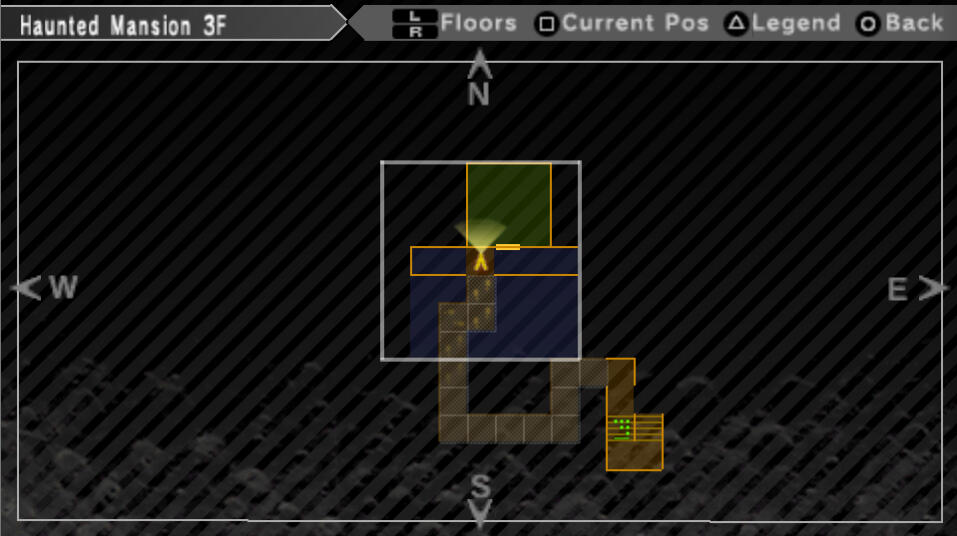
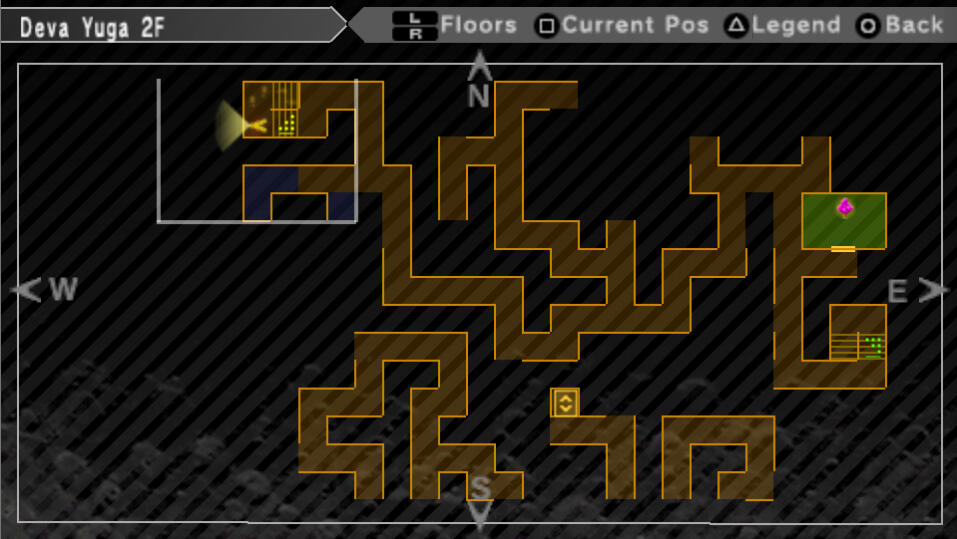
Once outside the dark room, there is a room to enter right in front of you. Enter and watch a cutscene, but please note that the good ending of the game depends on your choice here. To get the good ending, choose Lower your weapons. You'll now see a variety of important cutscenes.Once you're in control again, exit the room to enter Deva Yuga.
Thriivan's walkthroughs
Deva Yuga
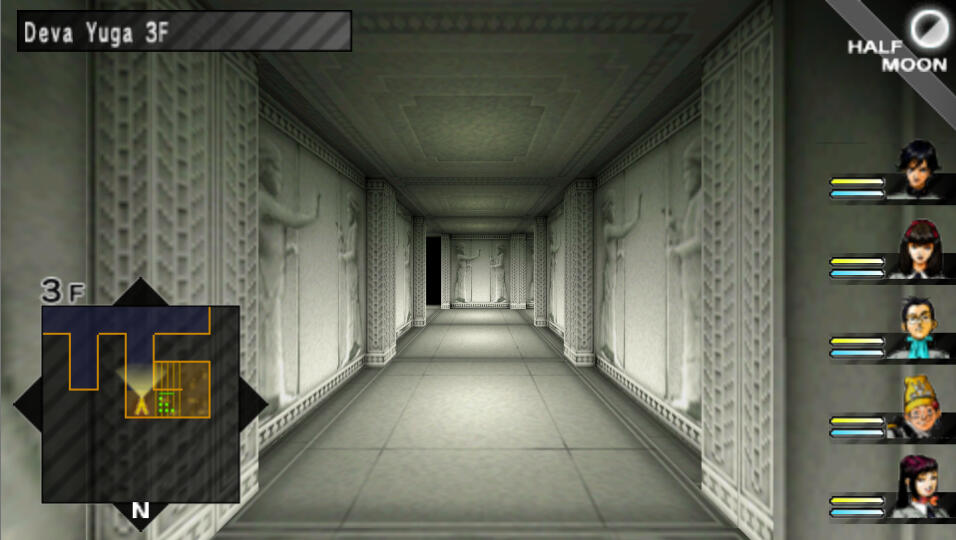
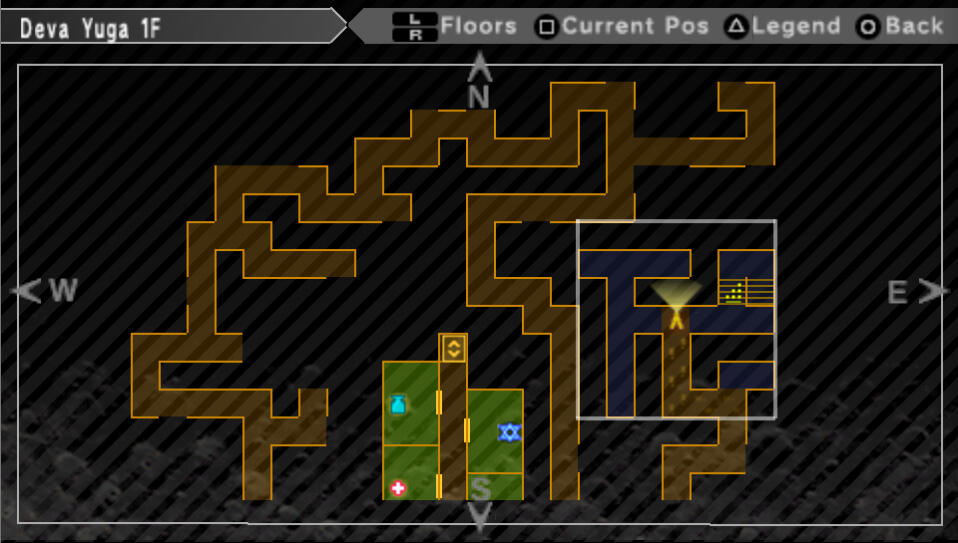
Straight ahead as you enter, there are a bunch of rooms for you to prepare yourself for going directly into another dungeon. The first room on the right is an Agastya Tree, behind it is a Velvet Room. On the left side of the hall is a Fairy Spring and a General Store. When you're ready, take the elevator to 2F.On 2F, head east, south, east, north, and south at the fork and keep heading south until you see a room to the west. Enter. Open the three chests to obtain Muscle Drink x4, Chewing Soul x2, Repulse Bell. Go ahead and retrace your steps back to the elevator and take it up to 3F now.On 3F , head south until you reach the fork. We are heading east here, but just FYI, if you were to go west, and through the gate north, there is a hole that makes you fall down to 1F if you need to go back to save, heal, etc. Anyway, head east at the fork, through the open area, and take the first hallway that leads south. keep following this path until you see a staircase to the west and go down these stairs to 2F.On 2F, it's a pretty easy path so just follow it north and back south until you reach another staircase. Take them down to 1F.On 1F, head west and a bit south to find an Agastya Tree room. When you're ready, go ahead and go back east from the room and head north. When you hit the fork, head west and then north and try to work your way to the east side of the map to find another set of stairs. There is a screenshot below to help since this floor is a bit complex. Take the stairs up to 2F.
On 2F, head just around the corner and north of the staircase to find an Agastya Tree room. Save your game, and head west and work your way northwest for another staircase, and take them up to 3F. Another screenshot below since these floors are so complex.
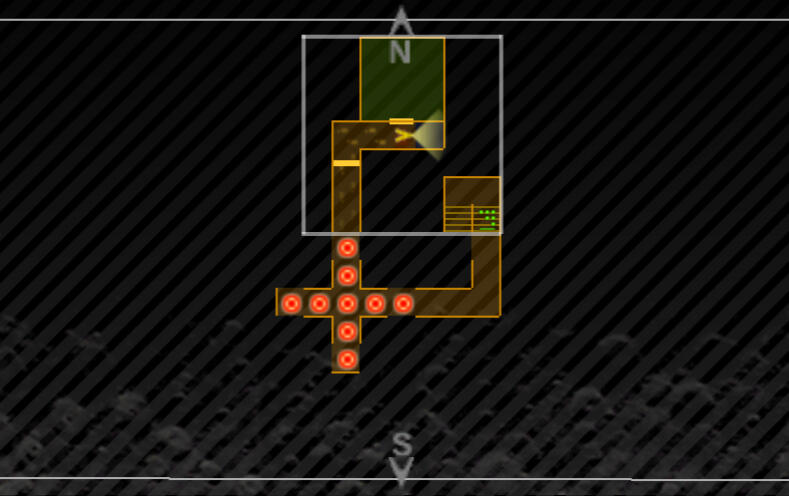
On 3F, head south past the open area and into the fork south of it. Head east from there until you find a room. Enter and open the left two chests in here to obtain Black Tablet and St Incense. Ignore the third chest, it just hurts you. Exit the room and head down the south pathway and follow it as it turns back north until you reach another large open area. take the northeast path and follow it south until you find a set of stairs. Take them up to 4F.On 4F, head west for another Agastya Tree. From there, continue west until you find a big open area. Take the northwest hallway and follow it until you reach another room. Enter the room and open all 3 chests to obtain Metal Card, Tanzanite, and HP Incense. Exit the room and continue south to find another staircase. Take the stairs up to 5F.On 5F, follow the hallways north up to the northwest corner, and then east to the big open room. From the big open room, head to the northeastern corner and south a bit so you can pull the lever on the wall. Retrace your steps to that big ass open room and take the south hallway. There is only one path here, so follow it to the second lever and pull it. Now go back to the little open room you just pass through and stand in the middle to fall down to 4F.On 4F, you'll find a Velvet Room and an Agastya Tree directly to the left, so go ahead and fuse some personas and save your game. When you're ready, do not go through the gate, head up the stairs instead, taking you back up to 5F.On 5F, follow the hall to a room with 3 chests. Open the two in the top corner for Amethyst and Opal. Ignore the chest on the left, it hurts you with no reward. Exit through the left door, and just outside is a staircase. Go upstairs to 6F.On 6F, there is a puzzle where you toggle lights on and off, and you need to move back and forth the right way to form a big plus. It's pretty simple, so just turn all the lights on like I have in the screenshot below, and the rest off and it will unlock the gate to the north.
Once through the gate, be ready because you're about to fight Kandori. Heal up and enter the room. During the cutscene, you will be asked another one of those game-changing, important questions. Answer To find my reason to keep on track with the good ending.Boss: Kandori / God Kandori: He is weak against guns, and every element but fire. At first he doesn't have much health so just spam what you can and keep healed until he changes to his God Form. Once he switches, he will be weak against guns still, but resistant to all elements except for Nuclear, Fire, and Blast, so go ahead and switch up your offensive to kick his ass. Just make sure to keep yourself healed and you'll hack away at his big godly health bar.After the fight and the cutscenes, make your way back to 4F. Once there, save your game and then head through that gate that I told you to ignore earlier. You'll fall through the floor to 3F in front of a room that was previously locked. Enter the room to see some cutscenes.Note: If you messed up any of those important decisions throughout the game, the game will end here for you. If you did everything the way I suggested, there's still a bit more to go.Once you're in control again, talk to people if you like, then head to the corner on the right of the room and pick up Chaos Mirror Shard. Some more cutscenes will happen after you pick it up.After the cutscenes, you'll find yourself in the Lost Forest again.
Thriivan's walkthroughs
Lost Forest Part II
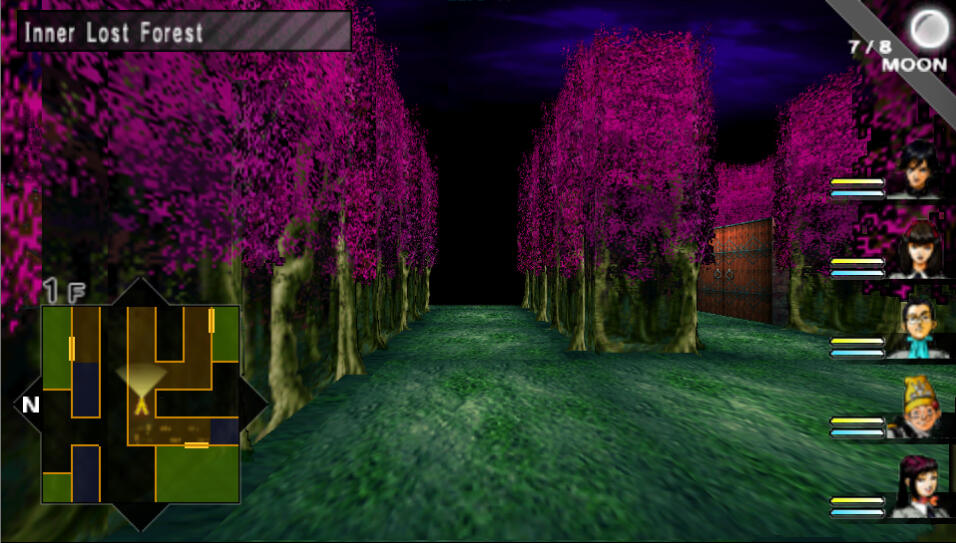
Once you're in control, you can exit to the city map by going left and save your game at the Agastya Tree, or alternatively, just enter the forest by going right and save at the one inside, it's up to you. Regardless, you are following the same path to the Gingerbread House just like last time. Upon entering, you will see a cutscene. After it's over, head through the top right door that was locked earlier in the game.You're now in Inner Lost Forest. Follow the path, taking either direction at the fork, until you reach the first rotating tile. From the rotating tile, go north and follow the path to a room. Open the 2 chests to obtain Metal Card and Pearl.Backtrack to the rotating tile and head east, then south, passing three more rotating tiles. You should see another room to the south, enter and open all chests except for the one in the top corner to receive Blue Tablet, Ruby, and SP Incense. Exit the room and head east from the nearest rotating tile.Head south at the first fork, west at the second fork, and north at the next fork. You'll hit an intersection with a rotating tile. There is a treasure room to the east with nothing but traps so fuck that, just head north from this tile until you hit another rotating tile at an intersection. shuffle back onto it to continue heading east, as far east as you can, and head north. This will lead you to a huge open space with some of those annoying tiles. make your way to the west end of this area to find a room with an Agastya Tree. I've included the tile layout in the screenshot below.
Save your game, and then head west to the fork first, you're taking the east path to grab a treasure chest from the room. Only open the left one to obtain Life Stone. Now make your way back to the fork and head west and enter the room for a cutscene. During this, you'll have another important choice. Say Don't hide like that! to keep the good ending.After the cutscene, Maki will be back in the party, just make sure to re-equip her gear. Go ahead and backtrack your way to the gingerbread house for some more cutscenes. After the cutscenes, you're free to leave the forest. Next stop is Alaya Shrine and Alaya Cavern.
Thriivan's walkthroughs
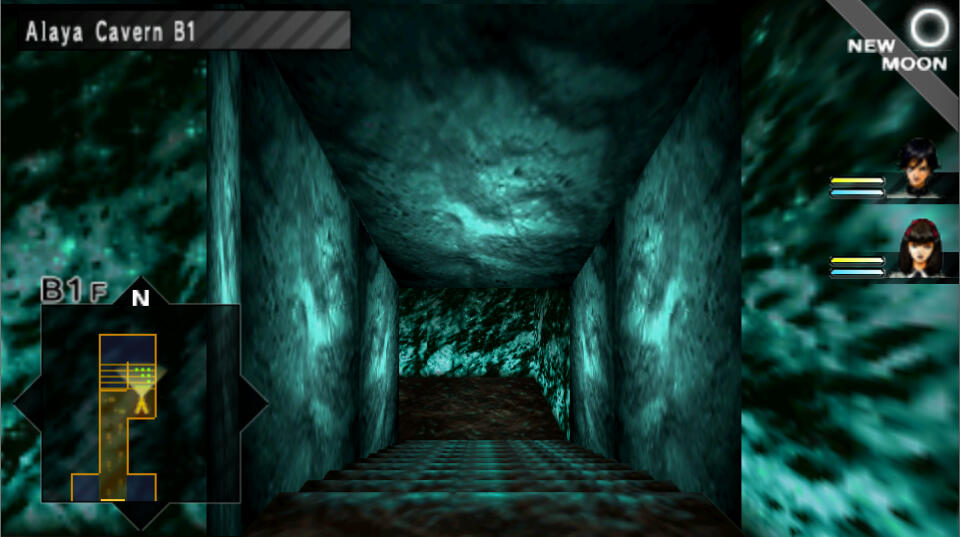
Alaya Cavern
Before you head to the shrine, make sure that MC and Maki have the best equipment possible, there is new items in the various shops. The next dungeon will only be the two of you. As a reminder, you'll find Alaya Shrine two screens south from here. Once you enter Alaya Shrine, you'll see a cutscene. I also recommend changing the formation so Maki is all the way in the back and MC is up front.When you enter, you start on B1F. Make your way north to the staircase and take it down to B2F.On B2F, the path west leads to a fairy spring. When ready, head east from the stairs and follow it north to reach a staircase that leads down to B3F.On B3F, if you take the path south you'll find an Agastya Tree, so when you're ready just take the other path to the stairs and go down to B4F.On B4F, just follow the path and you'll eventually find a treasure room. There are pod-like chests in here, open all 4 to obtain Balm of Life, Emerald, Chewing Soul, and Metal Card. Now you can backtrack to B3F, and keep backtracking to the stairs that you took down from B2F. Do not go up, you can go down here. Take it down to B5F.On B5F, there is a treasure room right next to you. Enter it to obtain Crimson Tablet from the chest on the left. Ignore the right chest. Exit the room, head back to the stairs, and take them down to B7F.On B7F, follow the path and it will lead you to another staircase going back up to B6F.On B6F, follow the path to a treasure room with 6 chests. Grab all chests except for the bottom corner one to obtain Diamond, Alexandrite, Bead, Sapphire, and Dragon Scale.Backtrack to the staircase and take it down to B87F.On B87F, back track to the previous staircase and travel to B8F.On B8F, head west and north, then head east at the fork. Keep making your way east until you see a room to the north, this is an Agastya Tree. When you're done, continue east, and turn south. Keep heading south until you hit the fork, then take the south route, and the east route to a room for more cutscenes.Exit the room, and follow the pathways west until you find stairs leading down to B9F.On B9F, just head east and the north into the big room to trigger some important cutscenes.After these scenes, you can go ahead and leave this place with an Emergency Exit or Traesto. Watch some scenes at the entrance and now....welp...there is one final dungeon after this. Prepare yourself the best you can, by grinding, replenishing any items, checking out the stores to make sure you have the best gear, going to the Velvet Room, etc. and whenever you're ready, head to St. Hermelin once again to open up Avidya World.
Thriivan's walkthroughs
Avidya World
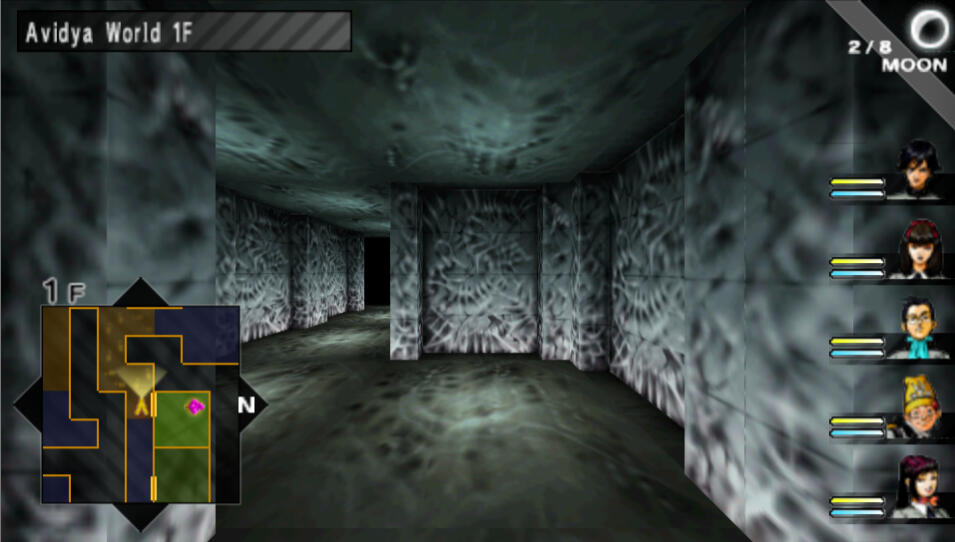
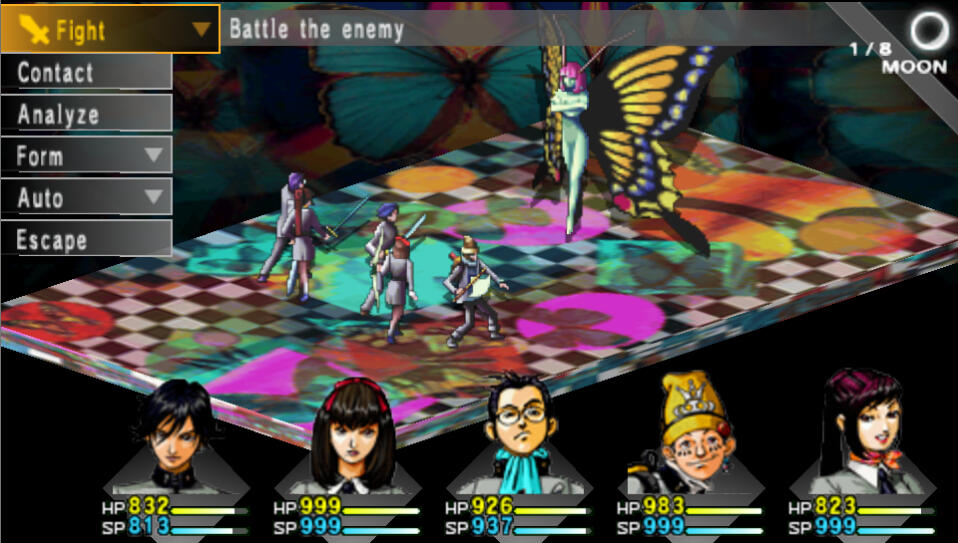
Head to St. Hermelin and head to the library on 3F to trigger the cutscenes that open up this final dungeon. Just FYI, this final dungeon is much more difficult than the last, so if you want to grind, you absolutely should. Also don't equip any Personas that are weak to Ice. If you have any that resist or absorb it, that's a plus.You start on 1F of the Avidya World dungeon. Make your way north until you spot two rooms right next to each other a bit east of you. This is a Agastya Tree and a Fairy Spring. Good place to grind if you need to. East and north of the Fairy Spring, you'll find a Velvet Room and a General Store. From the General Store, head east, then south, and follow the halls south until you see a path headed east, and turn there. Follow it north until you see 2 doors. You can enter either door and it will take you to the next area.From here you can continue north until you reach the most northern pathway and follow it east until there is a little south section, turn south there, head back west and then follow this hallways south until you see a bigger open hall to the east. Go through, and follow the only pathway you can. Eventually it will be a long hallway heading east, then it will zig zag north and south. Just keep going and you'll run into 2 doors again that lead to the next area.From here, head north and you'll find an Agastya Tree room next to another room with a locked door. Go ahead and save your game, then follow the path north. Keep following it as it turns east and then south. As it heads back west, there are lots of forks that reconnect and only a few dead ends, so just make your way west until you find a staircase leading up to 2F.On 2F, you'll find another Agastya Tree room with in front of you. The room next to it is locked, again. Head west and you'll find two more doors that lead to the next area.Now, just head south to find another one of those dark rooms. From the tile just outside, your directions are: 2N, 1W, 2N, 1E, 3N, 2W, 2N, 2E, 5N, 1W, 3N, 1E, 2N, 2W, 1N.No you're in a lit hallway, head all the way to the west end of it, and then 1S, 2W, 1N to reach another shorter lit hallway. Head west again, and from the tile directly outside the dark room, your directions are: 2S, 2W, 2S, 1E, 3S, 1E, 8S, 2E, 3S, 3W, 1N, 2W, 1S, 2W, 1S, 2W.Once you're to the other side, you'll find yourself by two more doors that lead to the next area, so go ahead and head through.this area's map is absolute swiss cheese but it's mostly all interconnected, so just try to make your way to the northwest section of the map until you find a staircase and take them back down to 1F.On 1F, south, east, north for another Fairy Spring and an Agastya Tree room. Just east from here is another General Store and a Velvet Room if you'd like to restock and fuse some new personas before moving on. When you're ready, just north of the Velvet Room and General Store are two more doors that lead to the next area.From here, head west and keep following along as the hallways turns north. It's a pretty straight forward path so just keep following it as it winds north and south until you eventually get taken to a staircase in the bottom east corner of the map. Take them down to B1F.On B1F, head north, west at the first turn, and southwest until you hit the southern most hallway. Head west, and turn north at the turn. Then make your way to the northwest hallway and head east when you see the turn, and head east again on the next fork. Make your way south and follow the pathway to reach a room in the middle of the map.This is the boss room. Just make sure you have the best personas and equipment to avoid taking damage from ice before heading in.Boss: Pandora: This is her first form. Use Guns and Nuclear if you can, and try to to just keep everyone healed up. Watch out for her paralysis attack too.
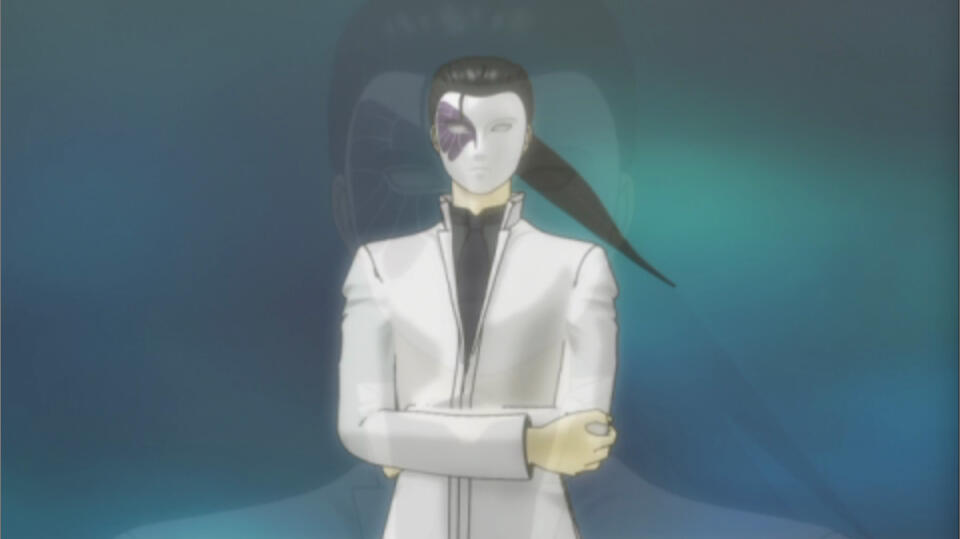
Boss: Butterfly Pandora: This is the REAL boss fight. She can change her attacks and weaknesses periodically so be careful. She also has 2 actions per turn.Pink Hair: Weak against weapons, and absorbs magic. Very strong.Blue Hair: Strong against Physical, weak against all magic except Ice. she uses lots of buffs and healing in this form but she is less dangerous in this form too.WHEN she changes forms is completely arbitrary, so just hang in there, you've got this. She has a massive health bar too, so be patient and keep yourself alive.
YOU FUCKING DID IT! This absolutely ridiculous game has finally come to a close. Thank you for sticking with me and I'm proud of you for making it through!If you are unhinged like me, and want to play every game in order, you can find me Persona 2: Innocent Sin Walkthrough below!
Thriivan's walkthroughs
Contact Guide
Below is a complete list of every persona and personality type you can encounter, and what to do to win their approval. To obtain their Spell Cards, you want to get their Eager level to max during Contact. Please note that these will not always work, if something makes them angry instead, try something else, you can usually spam the same option if it increases their Eager level, but not always. Regardless, this will help tremendously in gaining new personas, and getting stronger in the game. When a demon asks for you to give them something, just say yes, even if it's a little health. I only recommend saying no if they ask for a gem. Saying no will increase their Angry level though, so be careful.
Wise (Male): Culebre
Happy:
Eager: Taunt (MC), Pontificate
Angry: Persuade (MC), Bribe, Plead, Flatter
Scared: Invite (MC), Sing (MC), PrestidigitateFoolish (Male): Cockatrice, Nue, Ocelot
Happy: Persuade (MC, Yukino), Sing (MC), Sarcasm, Flatter
Eager: Bribe, Ignore (Yukino, Reiji), Lie
Angry: Taunt (MC, Mark), Invite (MC), Pontificate, Dance, Startle, Bully, Scold, Plead, Cringe, Threaten (Reiji), Scream
Scared: Condescend, Pickup, Abuse, PrestidigitateFoolish (Female): Yomotsu Shikome, Cath Paluc
Happy: Sing (MC), Bribe, Sarcasm, Stare, Brag, Soothe, Joke, Seduce, Persuade (Yukino), Scream
Eager: Abuse, Lie, Ignore (Yukino, Reiji)
Angry: Persuade (MC, Yukino), Taunt (MC), Invite (MC, Elly), Pontificate, Sing (Elly), Pickup, Chat, Startle, Cry, Threaten (Ayase, Reiji), Bully, Scold, Ignore, Scream
Scared: Condescend, Horrify, Abuse, Ignore (Yukino)Joyful (Male): Purski
Happy: Sing (MC), Dance, Chat, Scold, Prestidigitate
Eager: Invite (MC), Taunt (Mark)
Angry: Persuade (MC), Taunt (MC), Bribe, Stare, Invite (Elly), Bully, Scream, Threaten (Reiji)
Scared: Ignore (Reiji), Threaten (Reiji)Joyful (Female): Titania
Happy: Sing (MC), Dance, Brag
Eager: Invite (MC)
Angry: Persuade (MC), Taunt (MC), Invite (MC), Bribe, Pontificate, Condescend, Sarcasm, Stare
Scared:Gloomy: Zombie Nurse
Happy: Stare, Bully, Lie
Eager: Sarcasm
Angry: Persuade (MC, Yukino), Taunt (MC), Sing, Condescend, Dance, Brag, Scold, Ignore, Flatter, Lie, Threaten (Reiji)
Scared: Invite, Taunt (Mark)Forceful: Picollus, Kwancha
Happy:
Eager: Persuade (MC)
Angry: Invite (MC), Sing (MC), Dance, Taunt (Mark)
Scared: Taunt (MC)Timid (Male): Genkurou
Happy: Plead, Lie, Cringe
Eager: Dance
Angry: Persuade (MC), Sing (MC), Pontificate, Stare, Brag, Lie, Scream
Scared: Taunt (MC), Invite (MC), Flatter, Ignore (Reiji), Threaten (Reiji), PrestidigitateHaughty (Female): Selket
Happy: Sarcasm, Flatter, Prestidigitate
Eager: Stare
Angry: Persuade (MC), Taunt (MC), Invite (MC), Sing (MC), Lie, Cringe, Ignore (Reiji), Threaten (Reiji)
Scared: ScreamWise, Joyful (Male): Anatomy, Virtue
Happy: Sing, Pontificate, Persuade (Yukino), Scold, Plead, Lie, Cringe, Prestidigitate
Eager: Pontificate, Abuse, Plead
Angry: Persuade (MC), Taunt, Bribe, Pontificate, Condescend, Dance, Plead, Flatter, Scream
Scared: Invite, Bully, Ignore (Reiji), Threaten (Reiji)Wise, Gloomy (Male): Rakshasa
Happy: Sarcasm, Prestidigitate
Eager: Taunt (MC), Persuade (Yukino)
Angry: Persuade (MC), Bribe, Pontificate, Condescend, Dance, Bully, Scold, Plead, Flatter, Lie, Cringe, Threaten (Reiji), Scream
Scared: Invite (MC), Sing (MC), Taunt (Mark), Ignore (Reiji)Wise, Forceful (Male): Malphas
Happy:
Eager: Persuade (MC), Taunt (Mark), Soothe
Angry: Taunt (MC, Mark), Sing (MC, Elly), Sarcasm, Dance, Stare, Horrify
Scared: Invite (MC)Wise, Timid (Male): Tokebi
Happy: Soothe, Bully, Persuade (Yukino), Plead
Eager: Pontificate, Stare, Sing (Elly), Pickup
Angry: Persuade (MC), Sarcasm, Stare, Horrify, Invite (Elly), Ignore (Yukino), Flatter, Lie, Cringe
Scared: Taunt (MC), Invite (MC), Sing (MC), Condescend, Horrify, Scold, Ignore (Reiji), Threaten (Reiji), PrestidigitateWise, Haughty (Male): Eligor, Ouroboros
Happy: Persuade (MC), Pontificate, Sing (Elly)
Eager: Persuade (MC), Stare
Angry: Persuade (MC), Taunt (MC), Invite (MC, Elly), Bribe, Condescend, Sarcasm, Horrify, Soothe, Bully, Abuse, Threaten (Reiji), Scream
Scared: Sing (MC), StartleWise, Haughty (Female): Ocypete, Celaeno, Aello
Happy: Pontificate, Sarcasm, Dance, Stare, Brag, Prestidigitate
Eager: Taunt (MC, Mark), Stare, Brag, Chat, Cringe
Angry: Persuade (MC), Taunt (MC), Invite (MC, Elly), Bribe, Condescend, Brag, Pickup, Horrify, Sing (Elly), Soothe, Joke, Abuse, Seduce, Cry, Threaten (Ayase, Reiji), Plead, Flatter, Lie, Cringe, Scream
Scared: Sing (MC), Taunt (Mark), Ignore (Reiji)Foolish, Joyful (Male): Jack Frost
Happy: Persuade (MC), Sing, Dance, Stare, Soothe, Cringe
Eager: Invite (MC), Lie
Angry: Taunt (MC, Mark), Pickup, Joke, Horrify, Invite (Elly), Plead
Scared: FlatterFoolish, Joyful (Female): Fuji Musume, Rusalka, Nekomata
Happy: Persuade (MC, Yukino), Sing (MC), Lie, Cringe, Prestidigitate
Eager: Invite (MC), Ignore (Reiji)
Angry: Taunt (MC), Invite (MC), Bully, Plead, Flatter, Scream
Scared: Threaten (Reiji)Foolish, Gloomy: Slime
Happy: Sing (MC), Stare, Soothe, Invite (Elly), Pickup, Seduce, Bully
Eager: Invite (MC), Bribe, Cry
Angry: Persuade (MC, Yukino), Taunt (MC), Dance, Brag, Pontificate, Sing (Elly), Threaten
Scared: Taunt (Mark), Horrify, AbuseFoolish, Forceful: Zombie Girl
Happy: Sing, Dance, Seduce, Persuade (Yukino), Scream
Eager: Threaten, Ignore (Yukino, Reiji)
Angry: Persuade (MC), Invite, Threaten (MC, Mark), Bribe, Pontificate, Condescend, Sarcasm, Horrify, Chat, Abuse, Cry, Bully, Scold
Scared: Ignore (Yukino), PrestidigitateFoolish, Timid (Male): Mr. Zombie, Zombie Boy, Ghost, Agathion
Happy: Persuade (MC, Yukino), Sing (MC), Brag, Bribe, Sarcasm, Invite (Elly), Seduce
Eager: Dance, Sing (Elly), Threaten, Ignore
Angry: Stare, Pontificate, Horrify, Soothe, Bully
Scared: Taunt, Invite, Condescend, Abuse, Cry, ScoldFoolish, Snappish (Male): Nacht Kobold, Hoodlum, Afanc, Ogre, Phunbaba, Zap, Mizuchi, Mushus, Hecatoncheires
Happy: Persuade (MC, Yukino), Bribe, Sarcasm, Invite (Elly), Soothe, Seduce, Scold, Scream, Flatter
Eager: Bribe, Condescend, Sarcasm, Invite (Elly), Startle, Threaten (Reiji)
Angry: Taunt (MC, Mark), Invite (MC), Sing (MC, Elly), Bribe, Condescend, Dance, Stare, Brag, Pontificate, Pickup, Joke, Chat, Startle, Abuse, Bully, Persuade (Yukino), Ignore (Yukino, Reiji), Plead, Flatter, Lie, Cringe, Threaten (Reiji), Scream
Scared: Horrify, Abuse, Scold, Scream, PrestidigitateJoyful, Forceful (Male): Cu Sith, Nisroc, Teketeke
Happy: Lie, Cringe, Scream, Prestidigitate
Eager: Persuade (MC), Invite (MC), Startle
Angry: Taunt (MC, Mark), Bribe, Pontificate, Condescend, Sarcasm, Dance, Stare, Pickup, Joke, Chat, Bully, Plead, Flatter, Ignore (Reiji)
Scared: Threaten (Reiji)Joyful, Forceful (Female): Yaksini, Dakini
Happy: Sing (MC), Pickup
Eager: Persuade (MC), Invite (MC), Chat, Startle
Angry: Taunt, Invite (MC), Sing (Elly), Soothe, Joke, Bully, Persuade (Yukino), Abuse, Plead
Scared: ScoldJoyful, Timid (Male): Knocker
Happy: Invite (Elly), Persuade (Yukino)
Eager: Sing (Elly), Brag
Angry: Horrify, Soothe
Scared: Bully, ScoldJoyful, Timid (Female): Pixie, Succubus
Happy: Sing (MC), Dance, Bribe, Persuade (Yukino), Prestidigitate
Eager: Brag, Condescend, Abuse, Plead
Angry: Persuade (MC), Stare, Pontificate, Sarcasm, Horrify, Seduce, Threaten (Ayase), Bully
Scared: Taunt (MC, Mark), Invite (MC), Condescend, Cry, Ignore (Reiji), Threaten (Reiji)Joyful, Haughty (Male): Gandharva, Cupid
Happy: Bribe, Pontificate, Dance, Seduce, Horrify, Sing (Elly), Prestidigitate
Eager: Persuade (MC), Invite (Elly), Taunt (Mark), Stare, Brag, Abuse
Angry: Persuade (MC), Taunt (MC), Invite (MC), Bribe, Condescend, Sarcasm, Cry, Threaten (Ayase), Soothe, Plead, Flatter, Lie, Cringe, Ignore (Reiji)
Scared: Bully, Threaten (Reiji), ScreamJoyful, Haughty (Female): Otohime, Paimon
Happy: Sing (MC), Dance, Pickup
Eager: Taunt (Mark), Stare
Angry: Persuade (MC), Taunt (MC), Invite (MC, Elly)
Scared:Gloomy, Forceful (Male): Yato no Kami, Haokah, Incubus
Happy: Bully, Flatter
Eager: Persuade (MC), Taunt (MC), Stare, Joke, Cry, Threaten (Ayase, Reiji), Cringe
Angry: Persuade (MC, Yukino), Taunt (MC, Mark), Invite (MC), Sing (MC, Elly), Dance, Stare, Brag, Horrify, Pickup, Chat, Startle, Abuse, Seduce, Scold, Plead, Lie, Ignore (Reiji)
Scared: Horrify, JokeGloomy, Forceful (Female): Megaera, Tisiphone, Alecto, Tlazolteotl
Happy: Pickup, Bully
Eager: Cringe, Threaten (Ayase, Reiji)
Angry: Persuade (MC, Yukino), Threaten (MC, Mark), Invite (MC), Sing (MC), Dance, Stare, Brag, Chat, Seduce, Horrify, Soothe, Cry, Scold, Ignore
Scared: Joke, Startle, Threaten (Ayase)Gloomy, Timid (Male): Preta, Ihika, Ba, Leprechaun, Yaka, Vetala
Happy: Bribe, Sarcasm, Dance, Pickup, Bully, Persuade (Yukino), Scold, Plead, Lie, Cringe, Prestidigitate
Eager: Dance, Sarcasm, Cry
Angry: Persuade (MC), Sing (MC, Elly), Stare, Brag, Pontificate, Condescend, Sarcasm, Joke, Chat, Horrify, Soothe, Invite (Elly), Seduce, Cry, Plead, Flatter
Scared: Taunt (MC, Mark), Invite (MC), Startle, Abuse, Cry, Threaten (Ayase, Reiji), Ignore (Yukino, Reiji), ScreamGloomy, Timid (Female): Quicksilver, Moh Shuvuu, Iwate, Scylla
Happy: Bribe, Pickup, Horrify, Scream, Prestidigitate
Eager: Sarcasm, Prestidigitate
Angry: Persuade (MC, Yukino), Sing (MC, Elly), Pontificate, Condescend, Dance, Stare, Brag, Joke, Chat, Soothe, Seduce, Cry, Bully, Scold, Ignore (Yukino), Plead, Flatter, Lie, Cringe
Scared: Taunt (MC, Mark), Invite (MC), Startle, Ignore (Reiji), Threaten (Ayase, Reiji), PrestidigitateGloomy, Snappish (Male): Kokkuri, Alastor, Hresvelgr
Happy: Pickup, Prestidigitate, Cringe
Eager: Condescend, Sarcasm, Brag, Invite (Elly), Cry
Angry: Persuade (MC, Yukino), Invite (MC, Elly), Sing (MC), Sarcasm, Dance, Brag, Joke, Chat, Soothe, Seduce, Cry, Threaten (Ayase, Reiji), Bully, Plead, Lie, Cringe, Ignore (Reiji), Scream
Scared: Invite (MC), Startle, Horrify, AbuseGloomy, Snappish (Female): Hannya, Arachne
Happy: Bribe, Brag, Pickup, Horrify, Scream, Prestidigitate
Eager: Sarcasm, Sing (Elly)
Angry: Persuade (MC, Yukino), Taunt (MC), Invite (MC, Elly), Sing (MC, Elly), Bribe, Pontificate, Dance, Stare, Brag, Joke, Soothe, Bully, Scold, Ignore (Reiji), Threaten (Reiji)
Scared: Condescend, Taunt (Mark), Cry, PrestidigitateGloomy, Haughty (Male): Zombie Painter
Happy: Stare, Prestidigitate
Eager: Taunt (MC), Stare
Angry: Persuade (MC), Dance, Taunt (Mark), Pickup, Chat, Startle, Threaten (Reiji)
Scared: Joke, Ignore (Reiji), ScreamGloomy, Haughty (Female): Hi no Enma, Sumizome
Happy: Sarcasm, Horrify, Flatter, Scream, Prestidigitate
Eager: Taunt (MC), Sarcasm, Stare
Angry: Persuade (MC, Yukino), Sing (Elly), Invite (MC, Elly), Bribe, Pontificate, Dance, Brag, Soothe, Ignore (Yukino), Plead, Lie, Cringe, Threaten (Reiji)
Scared: Condescend, Taunt (Mark), Bully, Scold, Ignore (Reiji)Forceful, Snappish (Male): Zombie Cop, Power, Gdon
Happy: Persuade (MC), Horrify, Invite (Elly), Bully, Flatter, Scream
Eager: Persuade (MC), Plead
Angry: Persuade (MC, Yukino), Taunt (MC, Mark), Invite (MC), Sing (Elly), Pontificate, Condescend, Sarcasm, Soothe, Pickup, Joke, Chat, Startle, Abuse, Seduce, Cry, Threaten (Ayase, Reiji), Scold, Ignore (Yukino, Reiji), Lie, Cringe
Scared:Forceful, Snappish (Female): Lilim
Happy: Flatter, Scream, Prestidigitate
Eager: Plead, Cringe
Angry: Taunt (MC), Lie, Ignore (Reiji), Threaten (Reiji)
Scared:Forceful, Haughty (Male): Yakuza, Dribbler, Archangel, Yaksa, Rukh
Happy: Horrify, Sing (MC, Elly), Soothe, Invite (Elly), Flatter
Eager: Invite (MC), Stare, Threaten (Ayase)
Angry: Persuade (MC, Yukino), Taunt (MC), Invite (MC), Sing (MC), Condescend, Stare, Soothe, Pickup, Joke, Chat, Startle, Abuse, Cry, Scold, Ignore (Yukino, Reiji), Plead, Lie, Cringe, Threaten (Reiji)
Scared: Invite (MC), Sing (MC), Bully, StartleForceful, Haughty (Female): Salome
Happy: Sing (MC), Pontificate, Brag, Pickup, Joke
Eager: Stare, Seduce, Threaten (Ayase)
Angry: Persuade (MC, Yukino), Taunt (MC, Mark), Invite (MC), Bribe, Sarcasm, Dance, Stare, Chat, Startle, Abuse, Horrify, Sing (Elly), Scold
Scared: BullyTimid, Snappish (Male): Toufei
Happy: Bribe
Eager: Sarcasm, Dance, Plead
Angry: Persuade (MC), Taunt (MC, Mark), Sing (MC), Pontificate, Stare, Brag, Lie, Cringe, Ignore (Reiji), Threaten (Reiji) Scream
Scared: Invite (MC), Condescend, Flatter, PrestidigitateWise, Joyful, Forceful (Male): Polisun, Jinn, Barbatos
Happy: Sing (MC)
Eager: Persuade (MC), Brag
Angry: Persuade (MC, Yukino), Taunt (MC), Sing (Elly), Dance, Invite (Elly), Abuse, Seduce, Threaten, Bully, Scold, Ignore
Scared: Invite (MC), CryWise, Gloomy, Snappish (Male): Berith, Fafnir
Happy: Pontificate, Dance
Eager: Condescend, Sarcasm
Angry: Persuade (MC), Taunt (MC), Sing (MC), Bribe, Stare, Brag, Plead, Flatter, Lie
Scared: Invite (MC), Taunt (Mark)Wise, Gloomy, Snappish (Female): Dark Elf
Happy: Horrify
Eager: Sarcasm, Chat, Persuade (Yukino)
Angry: Persuade (MC), Taunt (MC), Sing (MC, Elly), Soothe, Invite (Elly), Pickup, Joke, Startle, Seduce, Threaten, Bully, Scold, Ignore
Scared: Abuse, CryWise, Gloomy, Haughty (Female): Black Widow, Druj
Happy: Cringe, Prestidigitate
Eager: Stare
Angry: Persuade (MC), Taunt (MC), Invite (MC), Bribe, Sarcasm, Dance, Brag, Threaten (Reiji), Scream, Plead, Flatter, Lie, Cringe
Scared: Sing (MC), Taunt (Mark), Ignore (Reiji)Wise, Forceful, Haughty (Male): Principality, Naga, Dominion, Xiuhtecuhtli
Happy: Pontificate, Stare, Sing (Elly), Soothe, Prestidigitate
Eager: Persuade (MC), Stare, Soothe, Threaten (Reiji)
Angry: Persuade (MC, Yukino), Taunt (MC, Mark), Invite (MC, Elly), Bribe, Condescend, Sarcasm, Dance, Brag, Pickup, Joke, Chat, Startle, Abuse, Seduce, Cry, Scold, Ignore (Yukino), Plead, Flatter, Lie, Cringe, Scream
Scared: Sing (MC), Condescend, Horrify, Threaten (Ayase), Bully, Ignore (Reiji)Wise, Forceful, Haughty (Female): Sarashina-hime, Rangda, Throne
Happy: Pontificate, Sarcasm
Eager: Stare, Threaten (Reiji, Ayase)
Angry: Persuade (MC, Yukino), Taunt (MC, Mark), Invite (MC, Elly), Bribe, Condescend, Dance, Stare, Horrify, Sing (Elly), Soothe, Pickup, Joke, Chat, Startle, Abuse, Seduce, Scold, Ignore
Scared: Sing (MC), Bully, Threaten (Reiji)
Wise, Snappish, Haughty (Male): Girimehkala
Happy: Prestidigitate
Eager: Condescend
Angry: Persuade (MC), Taunt (MC), Invite (MC), Sing (MC), Bribe, Pontificate, Sarcasm, Dance, Stare, Brag, Plead, Flatter, Lie, Cringe, Threaten (Reiji), Scream
Scared: Taunt (Mark), Ignore (Reiji)Wise, Snappish, Haughty (Female): Pairika
Happy: Sing (MC), Prestidigitate
Eager: Sing (Elly), Chat, Persuade (Yukino), Plead
Angry: Persuade (MC), Taunt (MC), Invite (MC, Elly), Horrify, Soothe, Pickup, Startle, Bully, Flatter, Lie, Cringe
Scared: Joke, Ignore (Reiji)Foolish, Joyful, Forceful (Male): Pyro Jack
Happy: Persuade (MC), Flatter, Cringe
Eager: Invite (MC), Lie
Angry: Taunt (MC), Plead
Scared:Foolish, Joyful, Timid (Male): Ukobach, Angel
Happy: Persuade (MC, Yukino), Bribe, Dance, Brag, Seduce, Cringe, Prestidigitate
Eager: Sing (Elly), Cry, Lie, Threaten (Reiji)
Angry: Taunt (Mark), Stare, Pickup, Joke, Chat, Threaten (Yukino), Plead
Scared: Taunt (MC), Startle, Horrify, Abuse, Bully, Scold, Flatter, Ignore (Reiji), ScreamFoolish, Joyful, Timid (Female): Hanako
Happy: Persuade (MC), Sing (MC), Bribe, Pickup, Joke, Lie, Cringe, Prestidigitate
Eager: Startle, Ignore (Reiji)
Angry: Pontificate, Chat, Plead, Ignore (Reiji), Scream
Scared: Taunt (MC), Invite (MC), Flatter, Threaten (Reiji)Foolish, Gloomy, Timid (Male): Nightmare, Enku, Catoblepas
Happy: Sing (MC), Sarcasm, Invite (Elly), Pickup, Seduce, Bully
Eager: Cry, Ignore (Yukino), Lie, Threaten (Reiji)
Angry: Persuade (MC, Yukino), Invite (MC), Brag, Sing (Elly), Soothe, Joke, Chat, Plead, Flatter, Cringe
Scared: Taunt (MC), Condescend, Horrify, Startle, Abuse, Cry, Scold, Ignore (Reiji), Threaten (Reiji), ScreamFoolish, Gloomy, Timid (Female): Bukimi
Happy: Sing (MC), Bribe, Sarcasm, Dance, Stare, Pickup, Chat, Seduce, Bully, Lie, Scream, Prestidigitate
Eager: Sarcasm, Ignore (Reiji)
Angry: Persuade (MC, Yukino), Pontificate, Sarcasm, Brag, Soothe, Joke, Cry, Plead, Flatter, Cringe, Ignore (Reiji)
Scared: Taunt (MC, Mark), Invite (MC), Condescend, Startle, Threaten (Ayase, Reiji), Scold, Ignore (Yukino)Foolish, Gloomy, Snappish (Male): Poltergeist, Nozuchi
Happy: Brag, Bribe, Sarcasm, Pickup, Soothe, Invite (Elly), Seduce, Persuade (Yukino)
Eager: Bribe, Condescend, Invite (Elly)
Angry: Persuade (MC), Taunt (MC, Mark), Invite (MC), Sing (MC, Elly), Dance, Stare, Pontificate, Joke, Chat, Startle, Cry, Threaten (Ayase, Reiji), Bully, Scold, Ignore (Yukino, Reiji)
Scared: Horrify, Abuse, ScreamFoolish, Forceful, Snappish (Male): Orthrus, Ubelluris
Happy: Persuade (MC), Sarcasm, Invite (Elly), Soothe, Seduce, Flatter, Cringe, Scream
Eager: Taunt (MC), Pickup, Invite (Elly), Abuse
Angry: Taunt (MC, Mark), Persuade (MC, Yukino), Invite (MC), Sing (MC, Elly), Bribe, Pontificate, Condescend, Dance, Stare, Brag, Pickup, Cry, Threaten (Ayase, Reiji), Bully, Scold, Ignore (Yukino, Reiji), Plead, Lie
Scared: Invite (MC), Horrify, PrestidigitateJoyful, Forceful, Haughty (Female): Siren
Happy: Sing (MC), Pickup, Joke, Soothe
Eager: Stare, Brag, Seduce
Angry: Persuade (MC, Yukino), Taunt (MC, Mark), Invite (MC, Elly), Sing (Elly), Sarcasm, Dance, Joke, Chat, Startle, Abuse, Scold, Ignore
Scared: Horrify, Bully, Threaten (Reiji), ScreamJoyful, Timid, Snappish (Male): Kobold
Happy: Bribe, Stare, Persuade (Yukino)
Eager: Sarcasm, Stare, Abuse, Cry
Angry: Persuade (MC), Taunt (MC), Sing (MC), Stare, Seduce, Threaten, Bully, Ignore
Scared: Invite (MC), Cry, ScoldGloomy, Timid, Snappish (Female): Carrie
Happy: Persuade (MC), Bribe, Sarcasm, Horrify, Joke, Scream, Prestidigitate
Eager: Sarcasm, Dance, Invite (Elly)
Angry: Sing (MC, Elly), Pontificate, Stare, Brag, Soothe, Pickup, Chat, Startle, Plead, Flatter, Lie, Cringe, Ignore (Reiji), Threaten (Reiji)
Scared: Taunt (MC, Mark), Invite (MC), Condescend, AbuseForceful, Snappish, Haughty (Male): Cromm Cruach, Fenrir
Happy: Prestidigitate
Eager: Plead
Angry: Taunt (MC), Invite (MC), Stare, Flatter, Cringe
Scared:Wise, Joyful, Forceful, Haughty (Male): Cait Sith, Oberon, Ganesha
Happy: Sing (MC, Elly), Pontificate, Soothe, Plead, Prestidigitate
Eager: Sarcasm, Stare, Brag, Invite (Elly), Ignore (Reiji), Threaten (Reiji)
Angry: Persuade (MC, Yukino), Taunt, Invite (MC, Elly), Bribe, Condescend, Sarcasm, Pickup, Joke, Chat, Startle, Abuse, Seduce, Cry, Threaten (Ayase), Ignore (Yukino), Flatter, Lie, Scream
Scared: Horrify, Bully, Scold, Ignore (Reiji)Wise, Joyful, Timid, Snappish (Male): Gremlin
Happy: Abuse
Eager: Plead
Angry: Persuade (MC), Taunt (MC), Sing (MC), Bribe, Sarcasm, Stare, Flatter
Scared: Invite (MC)Wise, Gloomy, Forceful, Haughty (Male): Shadow, Adramelech
Happy: Sing (MC), Stare, Plead, Prestidigitate
Eager: Stare, Threaten (Ayase)
Angry: Persuade (MC, Yukino), Taunt (MC, Mark), Invite (MC), Bribe, Chat, Abuse, Plead, Flatter, Lie, Cringe, Threaten (Reiji), Scream
Scared: Ignore (Reiji)Wise, Gloomy, Timid, Snappish (Male): Duergar
Happy:
Eager: Bribe, Sarcasm
Angry: Taunt (MC), Invite (MC), Dance, Stare, Plead, Cringe
Scared: CondescendWise, Gloomy, Snappish, Haughty (Male): Doppelganger
Happy: Persuade (MC), Scream, Prestidigitate
Eager: Condescend, Chat, Persuade (Yukino)
Angry: Taunt, Invite, Bribe, Sarcasm, Sing (Elly), Joke, Startle, Seduce, Ignore (Yukino)
Scared: Horrify, Ignore (Reiji)Wise, Gloomy, Snappish, Haughty (Female): Kiyohime, Miyasudokoro
Happy: Dance, Scold, Prestidigitate
Eager: Condescend, Chat, Persuade (Yukino)
Angry: Taunt (MC, Mark), Invite (MC), Sing (MC), Bribe, Pontificate, Sarcasm, Stare, Brag, Pickup, Joke, Startle, Bully, Ignore (Yukino), Flatter, Lie, Cringe, Threaten (Reiji)
Scared: Abuse, Ignore (Reiji), ScreamWise, Forceful, Snappish, Haughty (Male): Tengu
Happy: Horrify, Prestidigitate
Eager: Soothe, Plead
Angry: Persuade (MC), Taunt (MC), Sing (MC, Elly), Pontificate, Condescend, Sarcasm, Dance, Stare, Invite (Elly), Threaten (Reiji), Scream
Scared: Ignore (Reiji)Foolish, Gloomy, Forceful, Snappish (Male): Wyvern
Happy: Sarcasm, Soothe, Invite (Elly), Pickup, Seduce, Cringe, Prestidigitate
Eager: Cry, Cringe
Angry: Persuade (MC, Yukino), Taunt (MC, Mark), Invite (MC), Sing (MC, Elly), Bribe, Pontificate, Condescend, Dance, Stare, Brag, Horrify, Abuse, Cry, Threaten (Ayase, Reiji), Bully, Scold, Plead, Ignore (Yukino)
Scared: Cry, Ignore (Reiji), ScreamFoolish, Gloomy, Timid, Snappish (Male): Legion
Happy: Prestidigitate
Eager: Dance, Cry
Angry: Persuade (MC), Taunt (MC), Sing (MC), Stare, Brag, Lie
Scared: Invite (MC), CryGloomy, Forceful, Snappish, Haughty (Female): Kuchisake-onna
Happy: Sarcasm, Pickup, Plead, Scream, Prestidigitate
Eager:
Angry: Persuade (MC, Yukino), Taunt (MC, Mark), Invite (MC, Elly), Sing (MC, Elly), Bribe, Pontificate, Condescend, Sarcasm, Dance, Stare, Brag, Joke, Chat, Startle, Horrify, Soothe, Bully, Scold, Ignore (Yukino, Reiji), Abuse, Seduce, Cry, Threaten (Ayase, Reiji) Scream, Plead, Flatter, Lie, Cringe
Scared: Threaten (Reiji), Prestidigitate